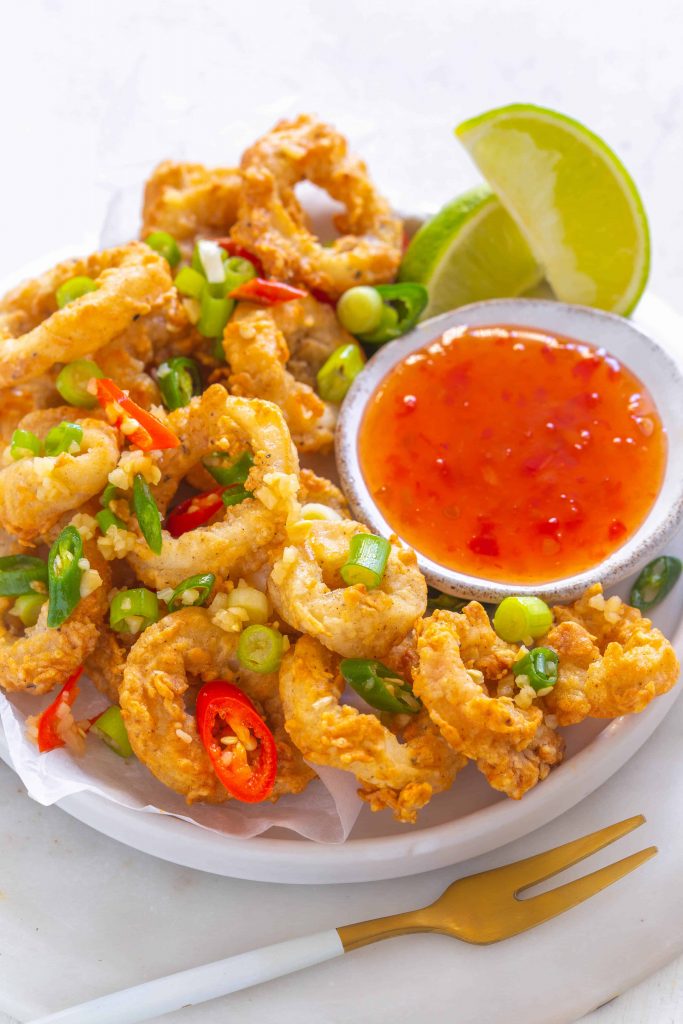
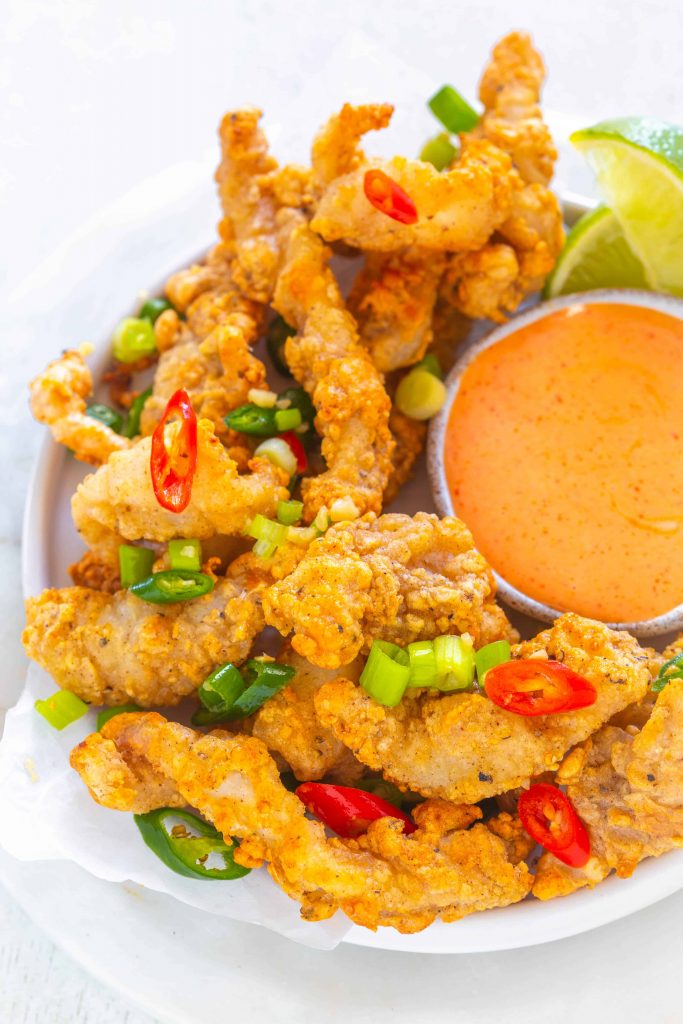
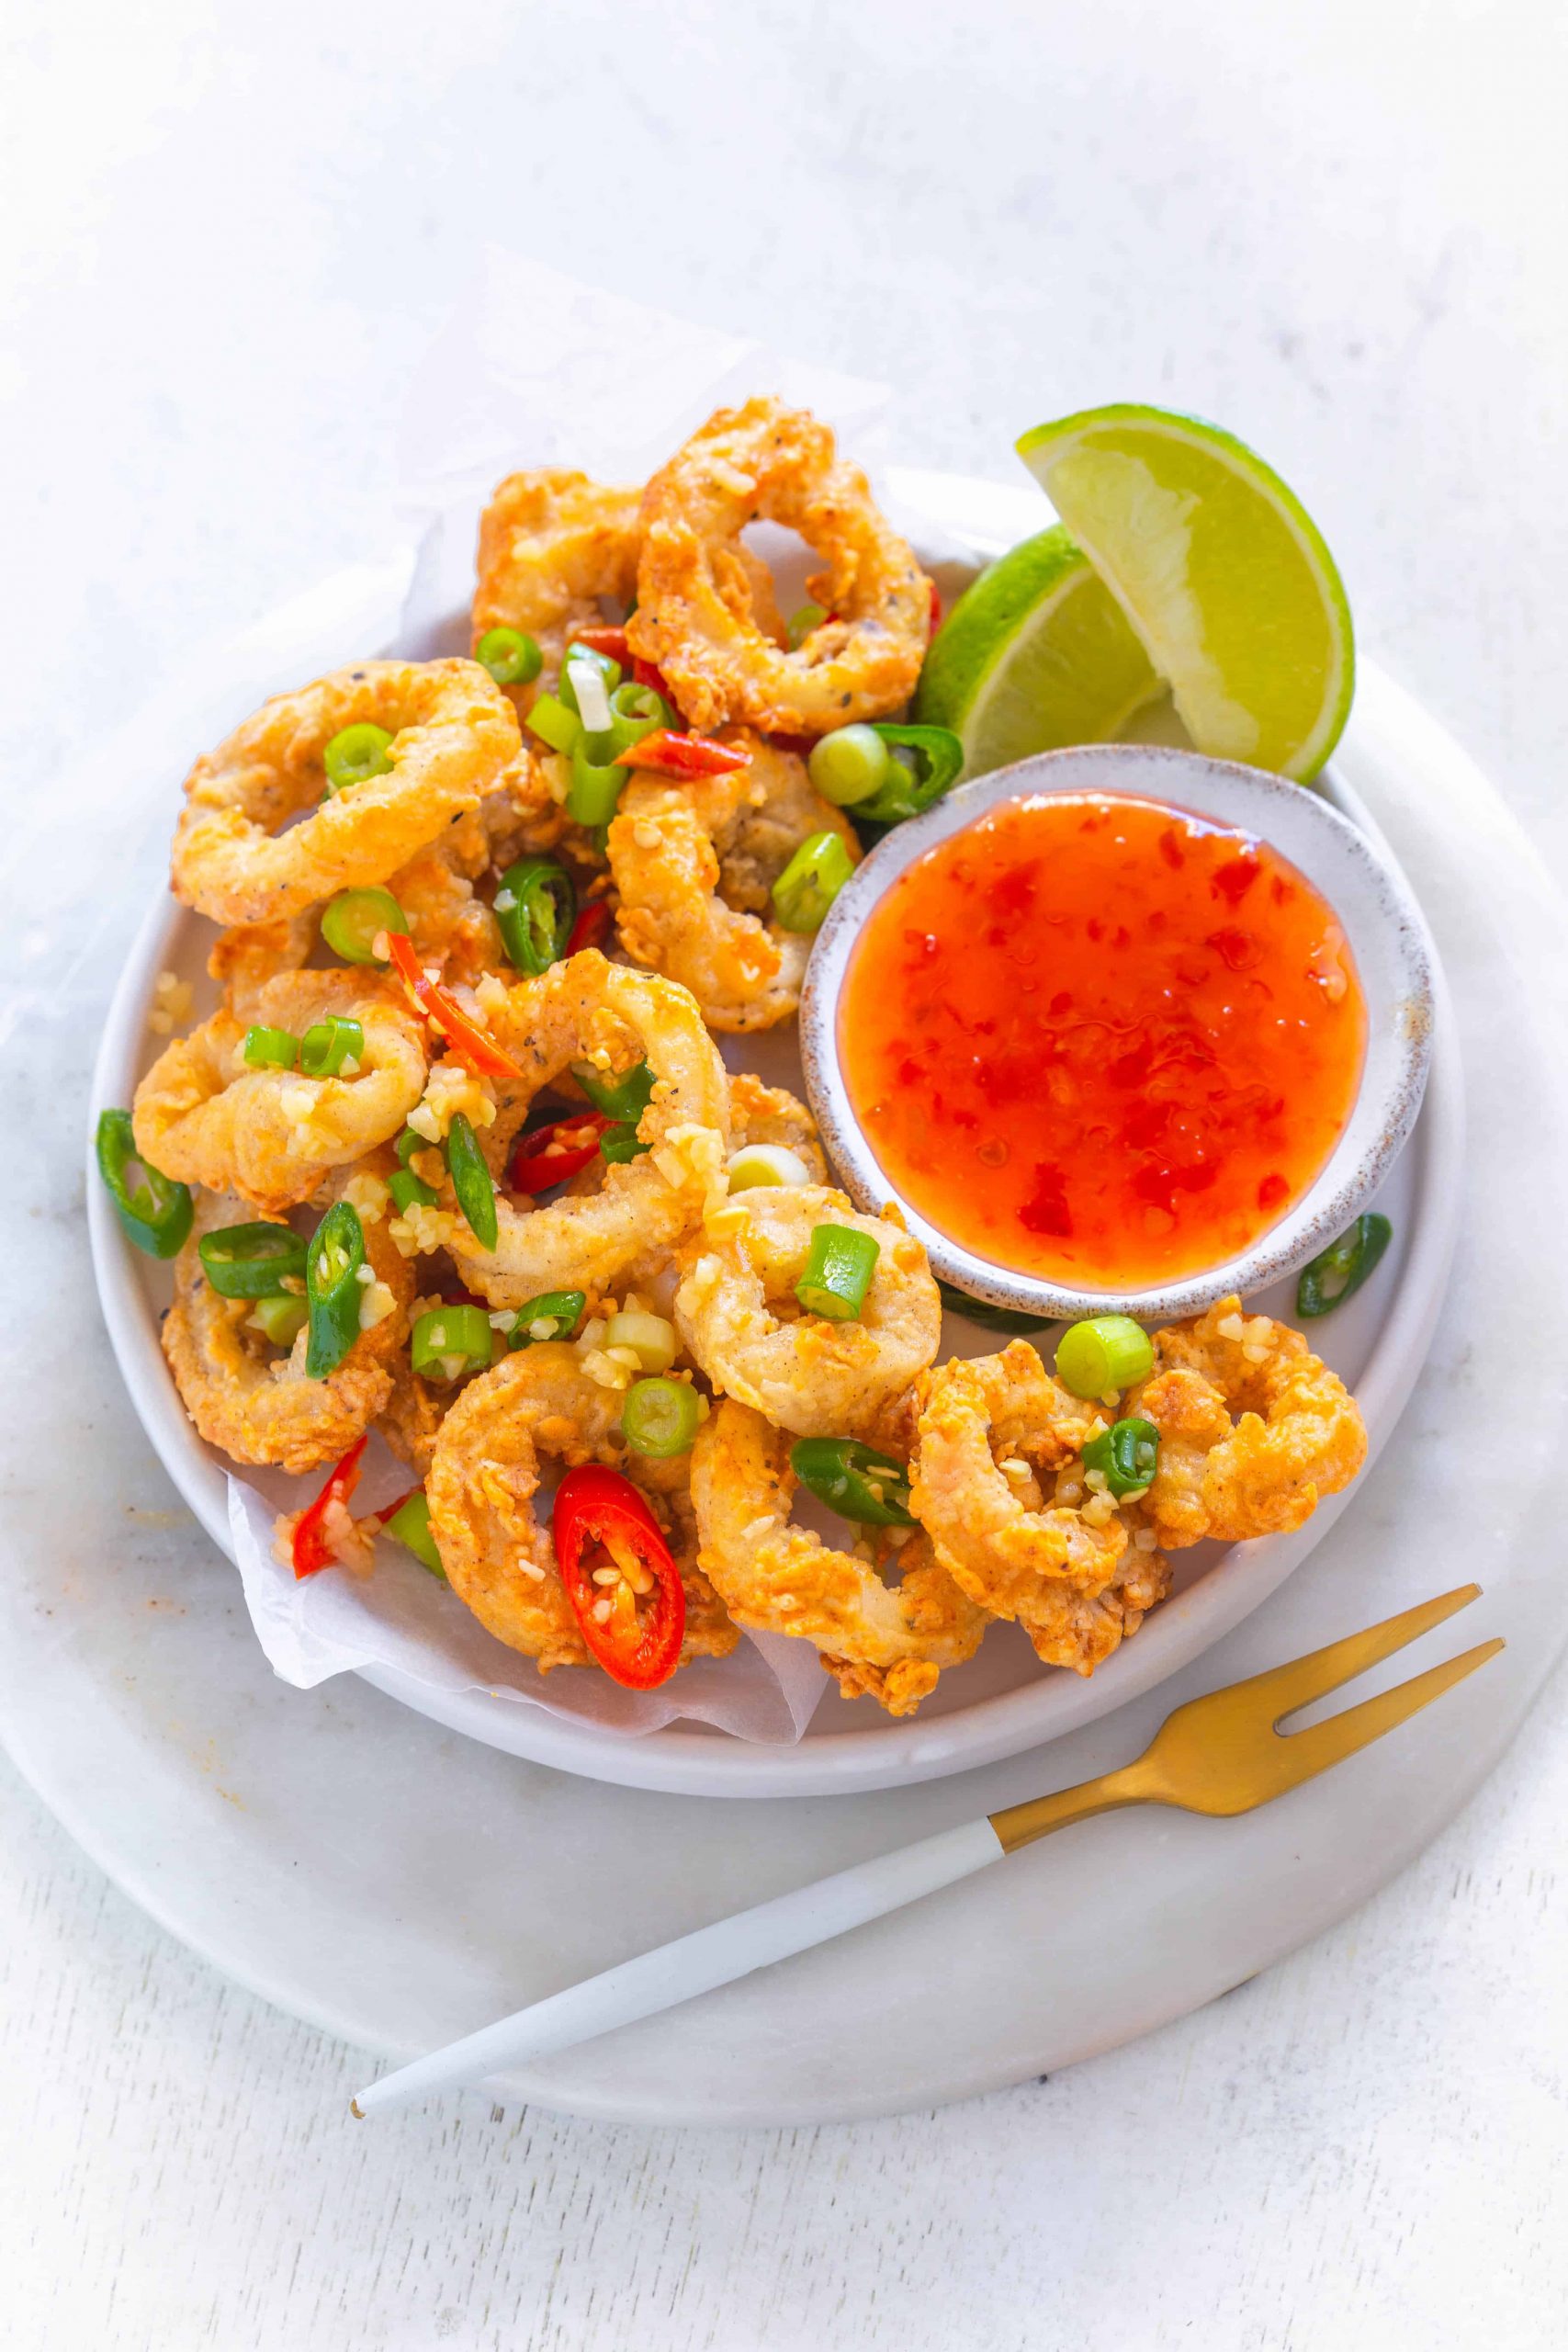
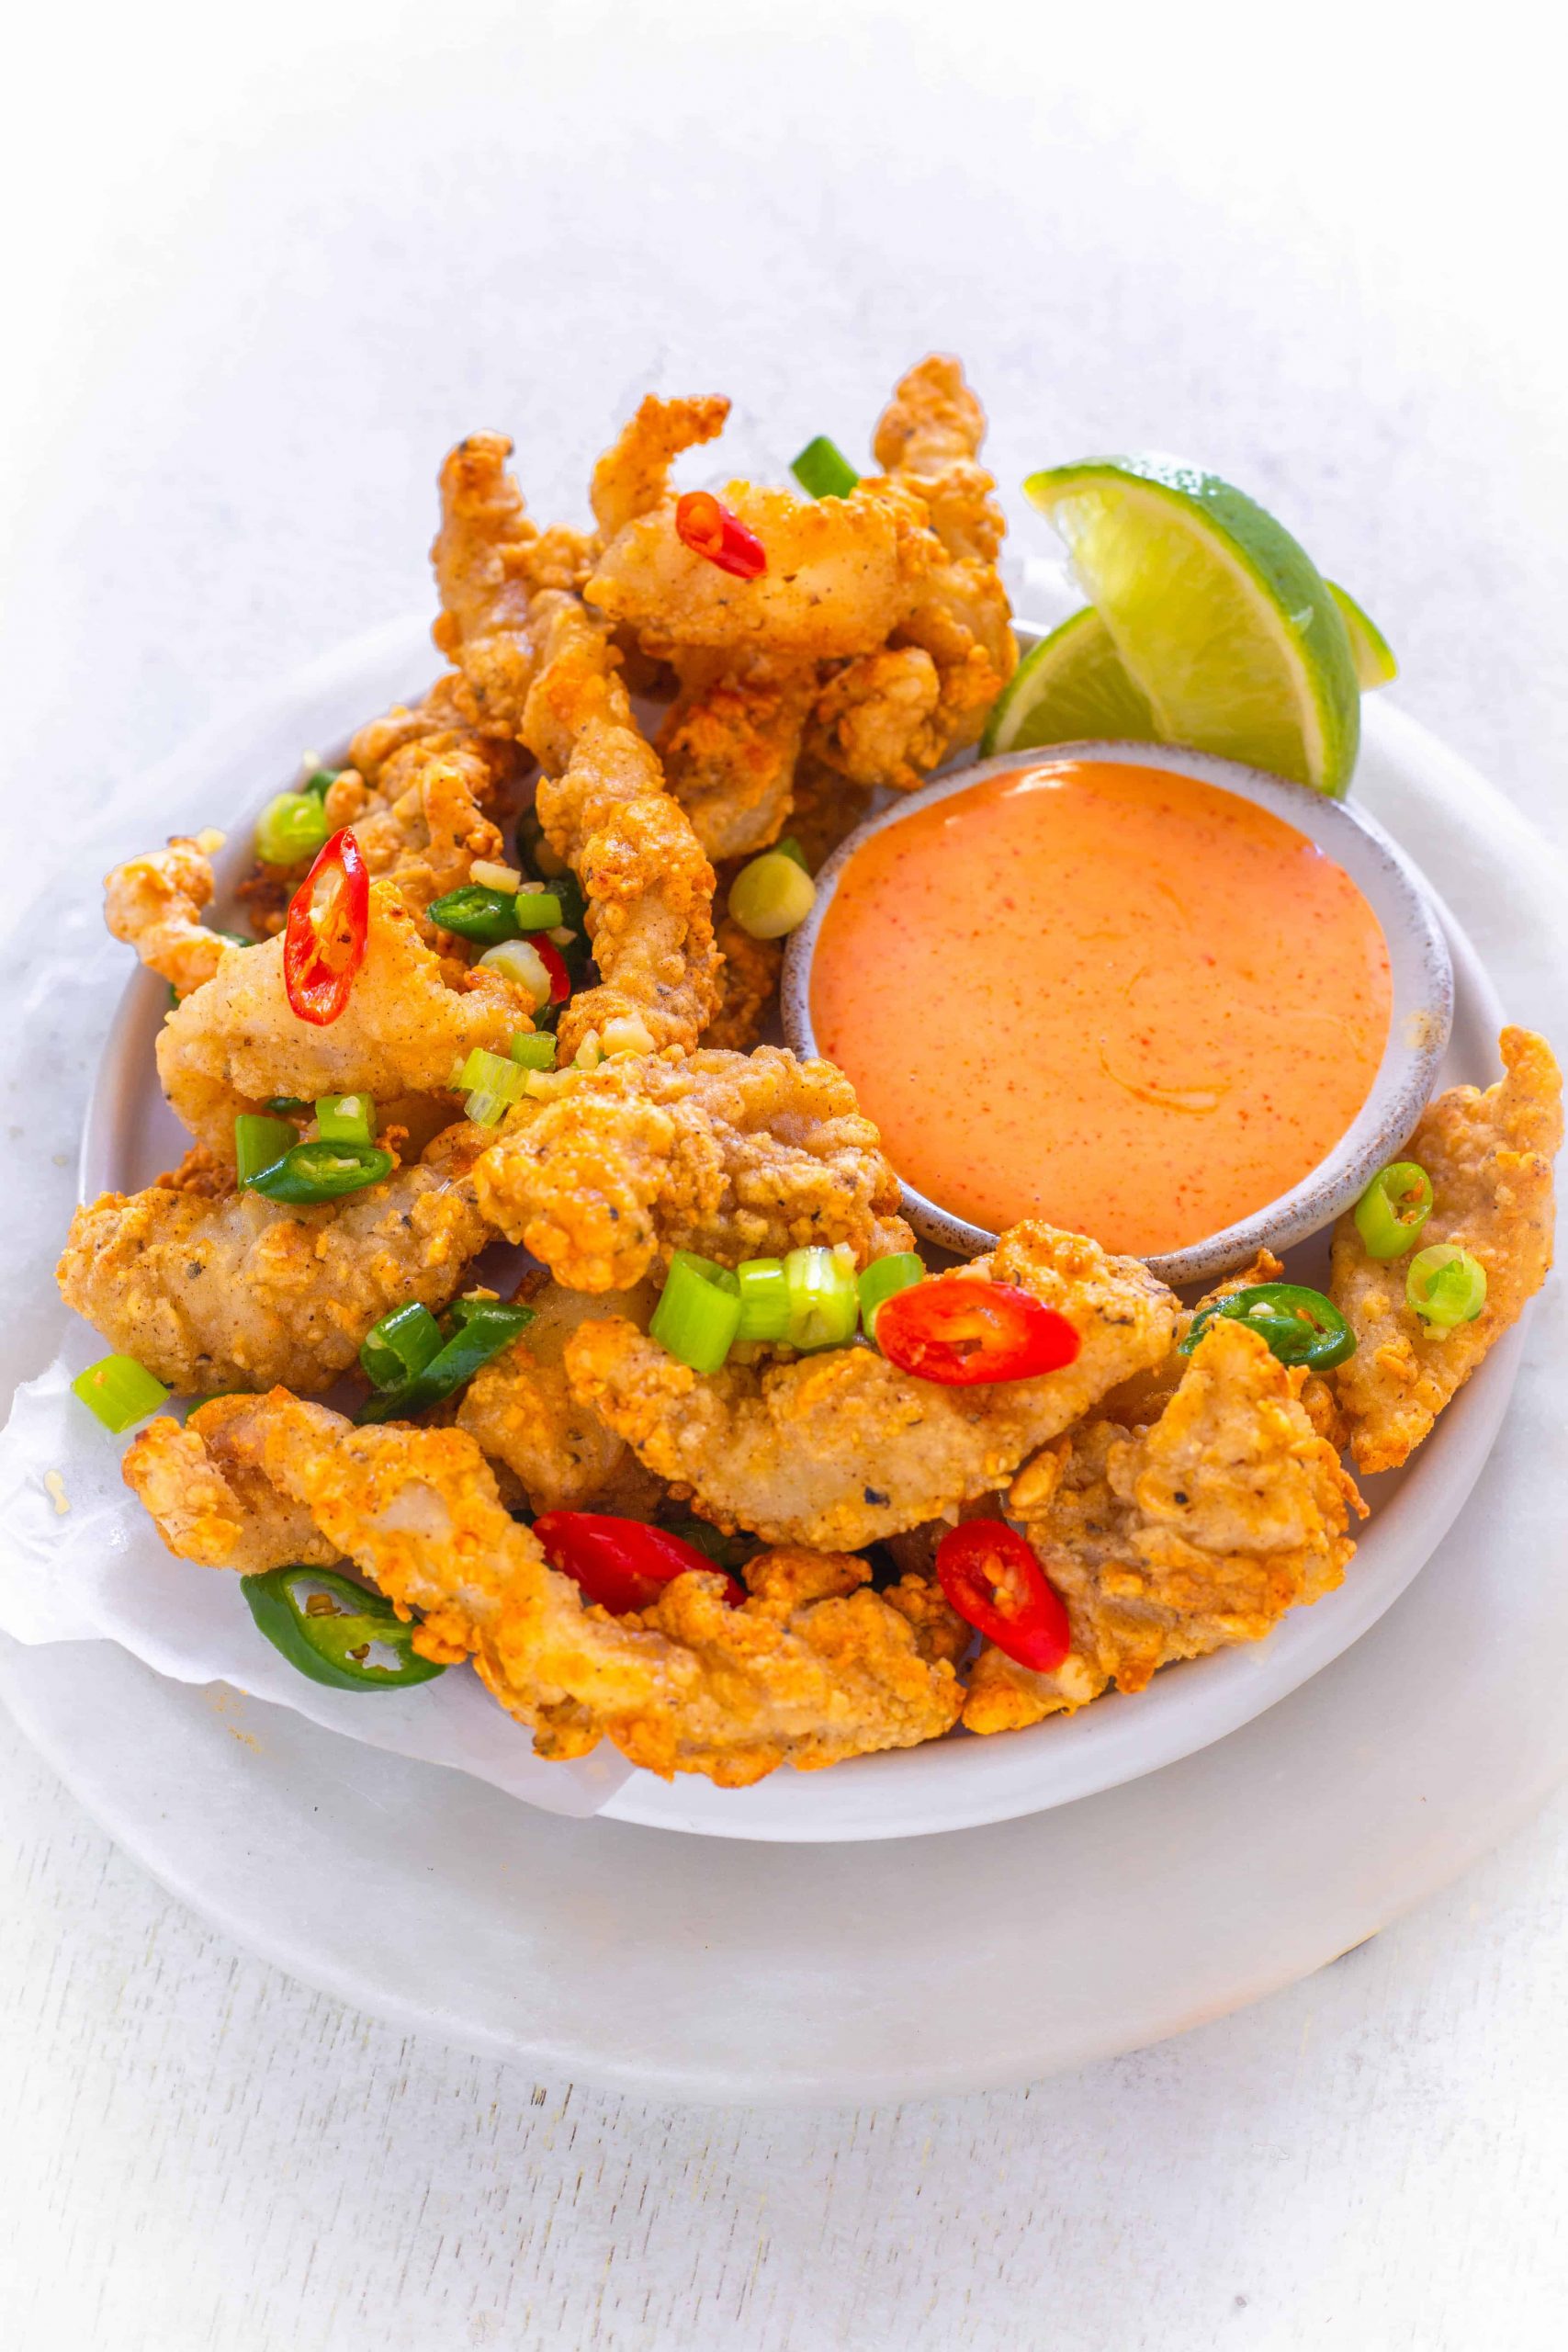
Air fryer Salt & Pepper Calamari is a Chinese takeout classic! This air fried calamari is crispy, crunchy, and spicy. A healthy & easy copycat recipe to make at home! Delicious squid coated in seasoned flour, air fried till golden brown & topped with stir fried garlic, chili, and green onions.
Tips on how to best prep calamari / squid
Squid / Calamari does require attention to detail when preparing for cooking, here are some tips on how best to prepare squid safely and cut into your desired shape.
How to clean calamari
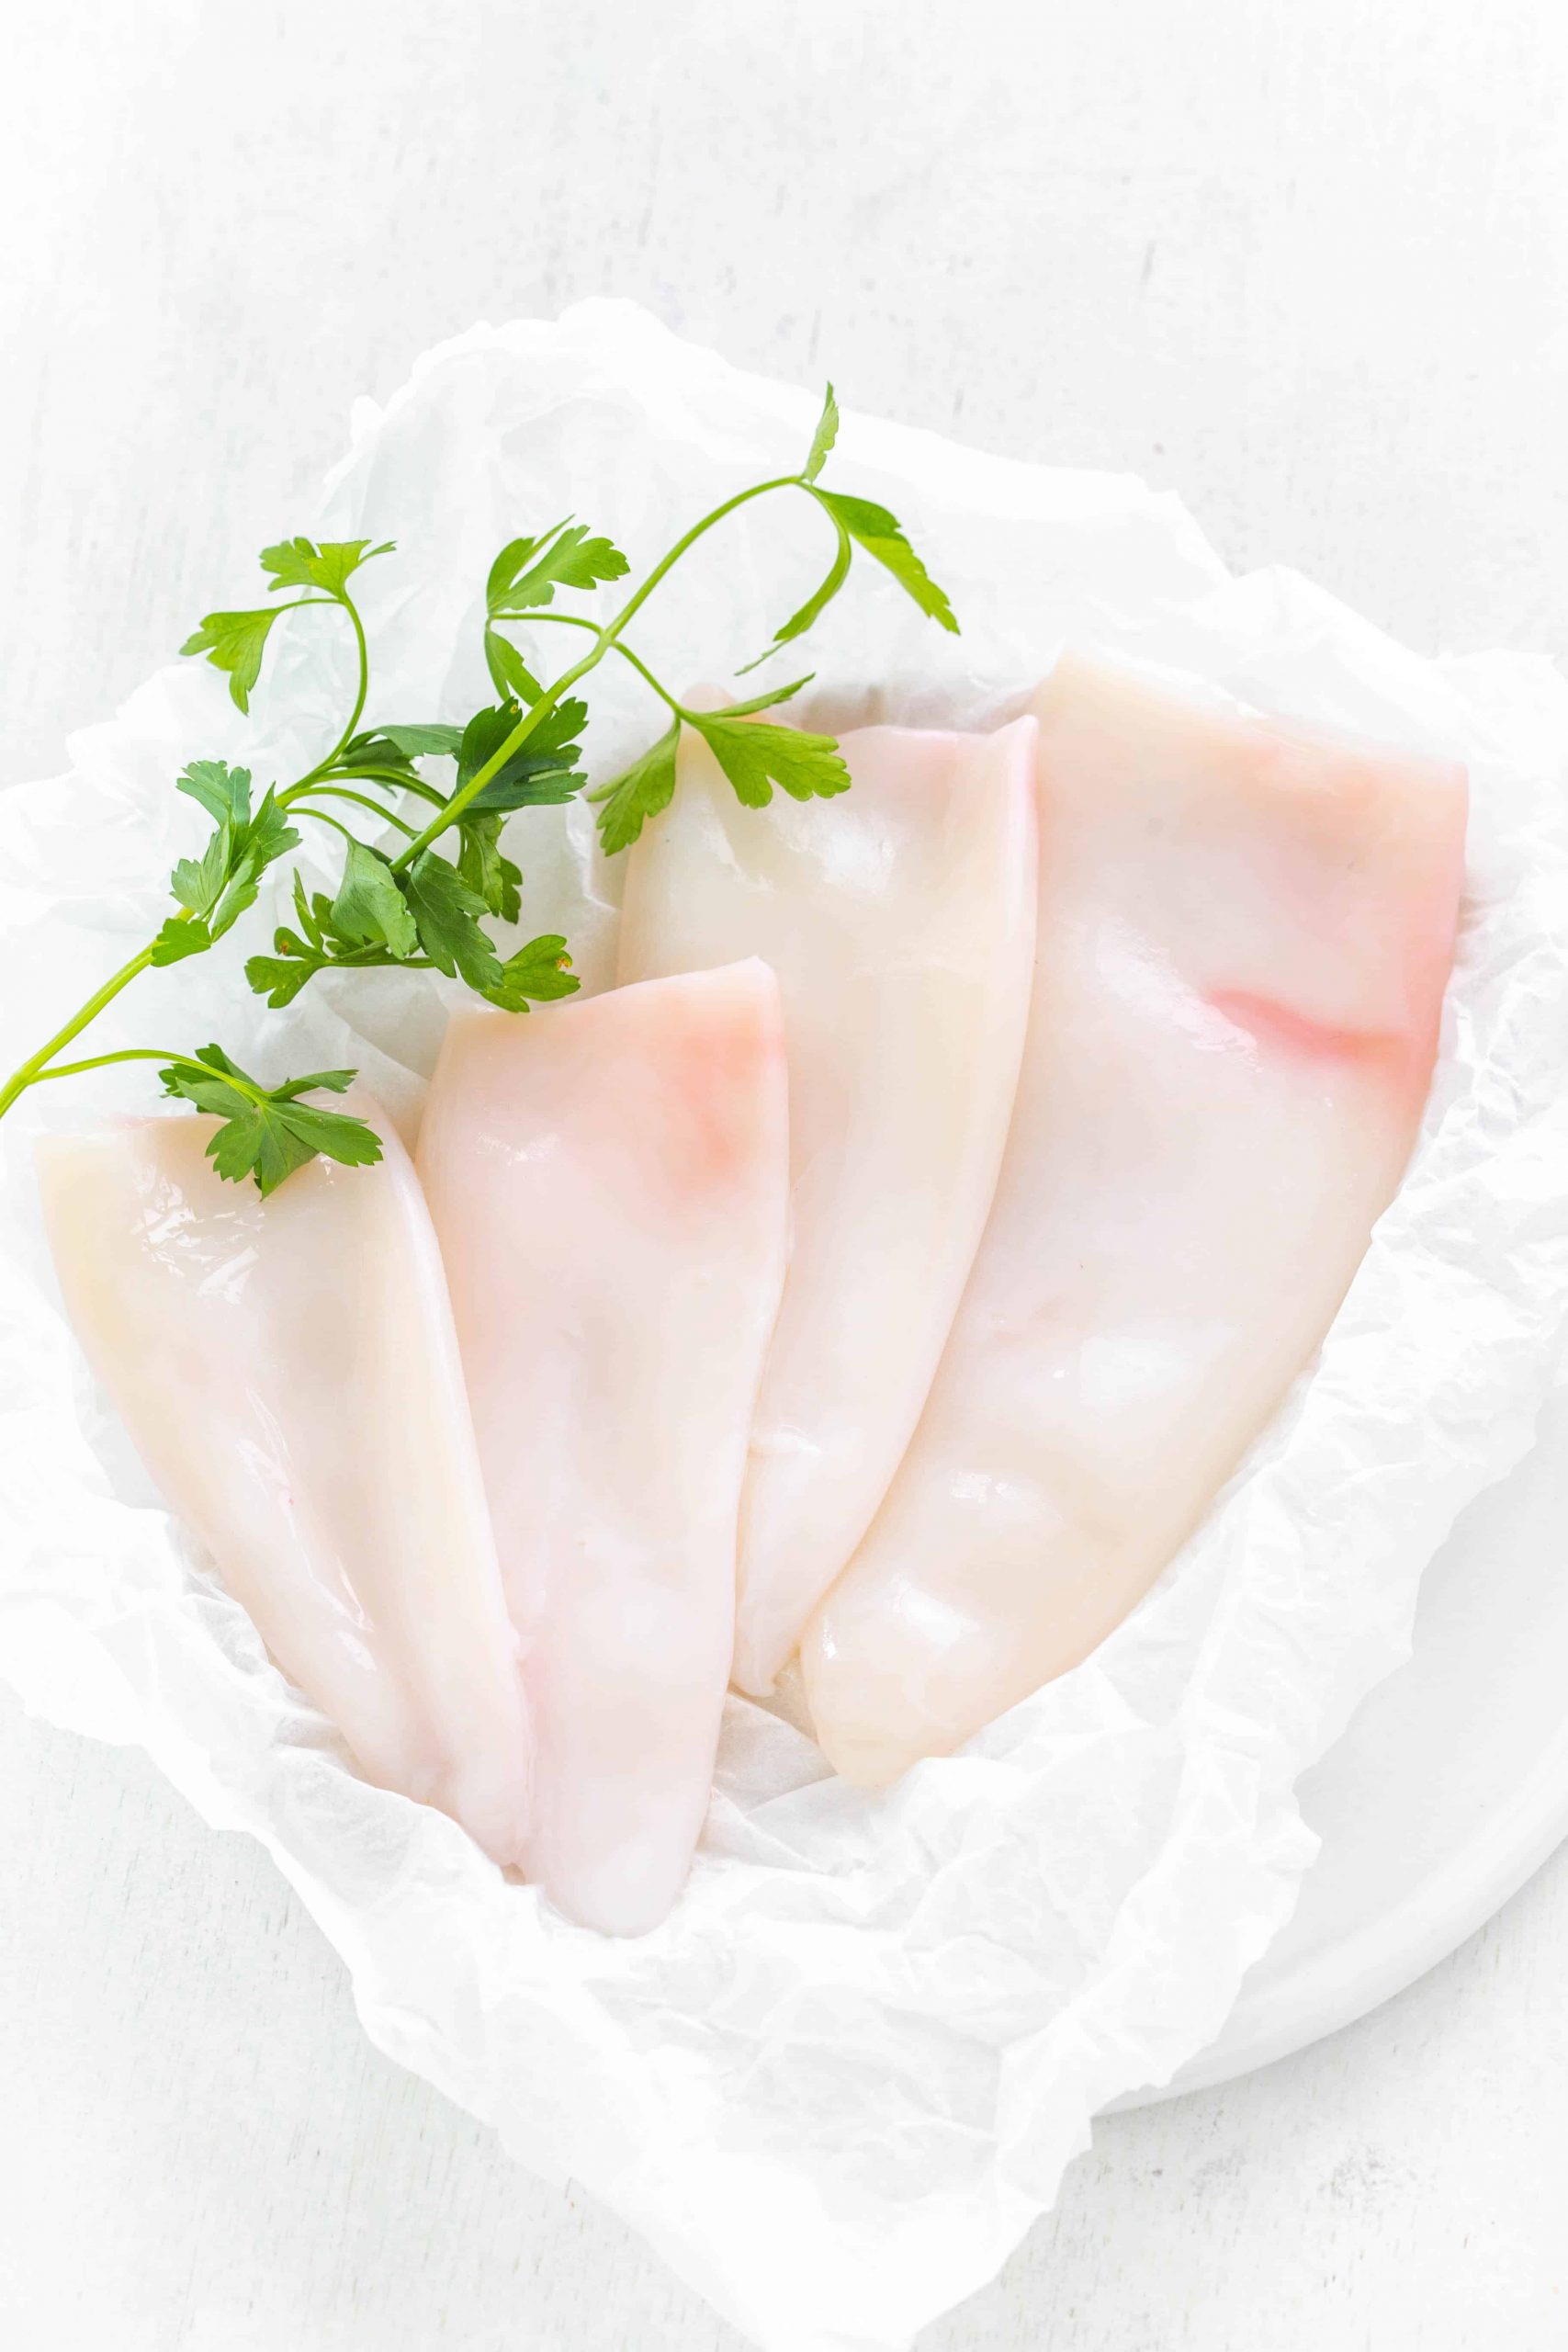
The best way to clean squid / calamari will depends on whether it is purchased whole or already pre prepped into squid rings. Frozen and fresh squid rings tend to be cleaned already so just require washing under cold water and placing on paper towels to drain. For whole squid cleaning is more rigorous as you need to remove the innards, head, beak, cartilage tube, cut the tentacles off and pullback the skin. Once completed wash in cold water and prep for cooking, you should be left with clean white squid tubes.
How to tenderize calamari
Calamari can be tenderised by marinating and soaking the calamari in a bowl of buttermilk for a minimum of 30 minutes in the fridge, which will help the squid be less chewy. The acidity in the buttermilk will help to tenderise the flesh. You can rinse the buttermilk off when ready for cooking or keep the buttermilk for breaded calamari recipes.
Find more great air fryer recipes below
- PF CHANG’S AIR FRYER ORANGE CHICKEN
- AIR FRYER LAMB CHOPS
- AIR FRYER KFC SOUTHERN FRIED CHICKEN DRUMSTICKS
- AIR FRYER GARLIC PARMESAN TRUFFLE FRIES
- PF CHANG’S DYNAMITE BANG BANG SHRIMP RECIPE
- AIR FRYER CHOCOLATE AND HAZELNUT HIGH PROTEIN GRANOLA RECIPE
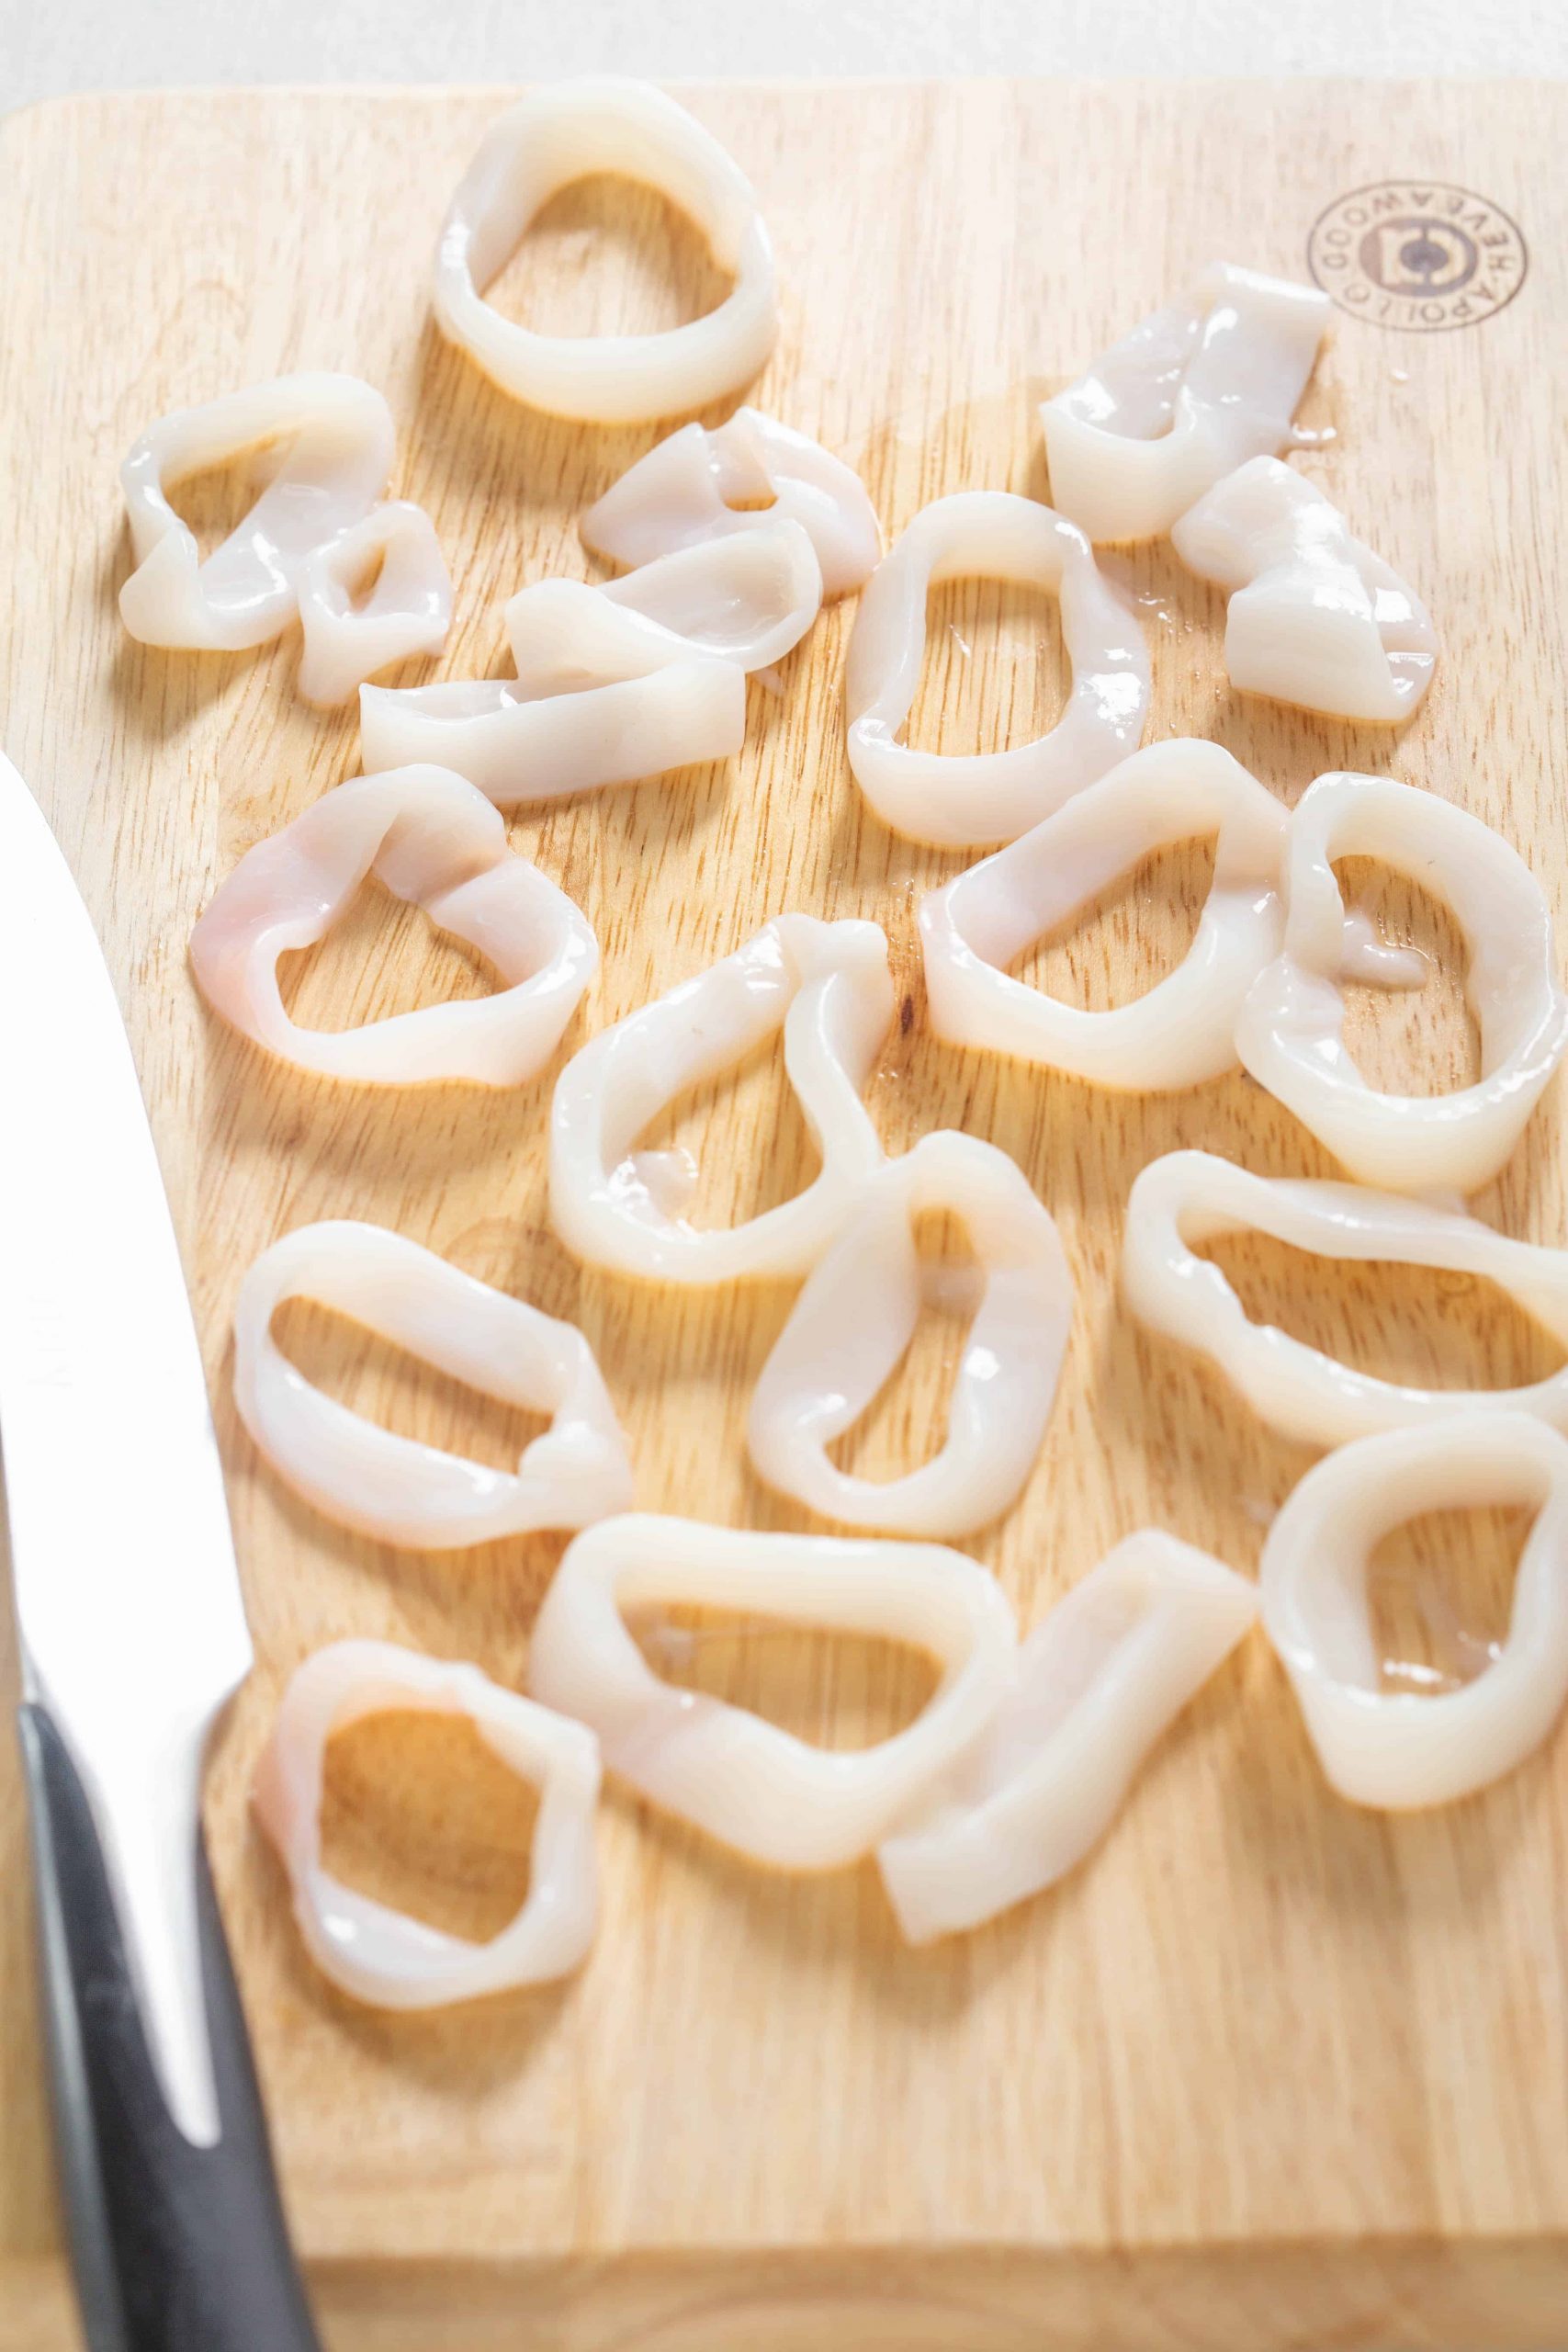
How to cut calamari rings
Place a freshly cleaned whole calamari tube onto a chopping board, press down on the calamari with one hand so it lays completely flat and then slice vertically into thin strips.
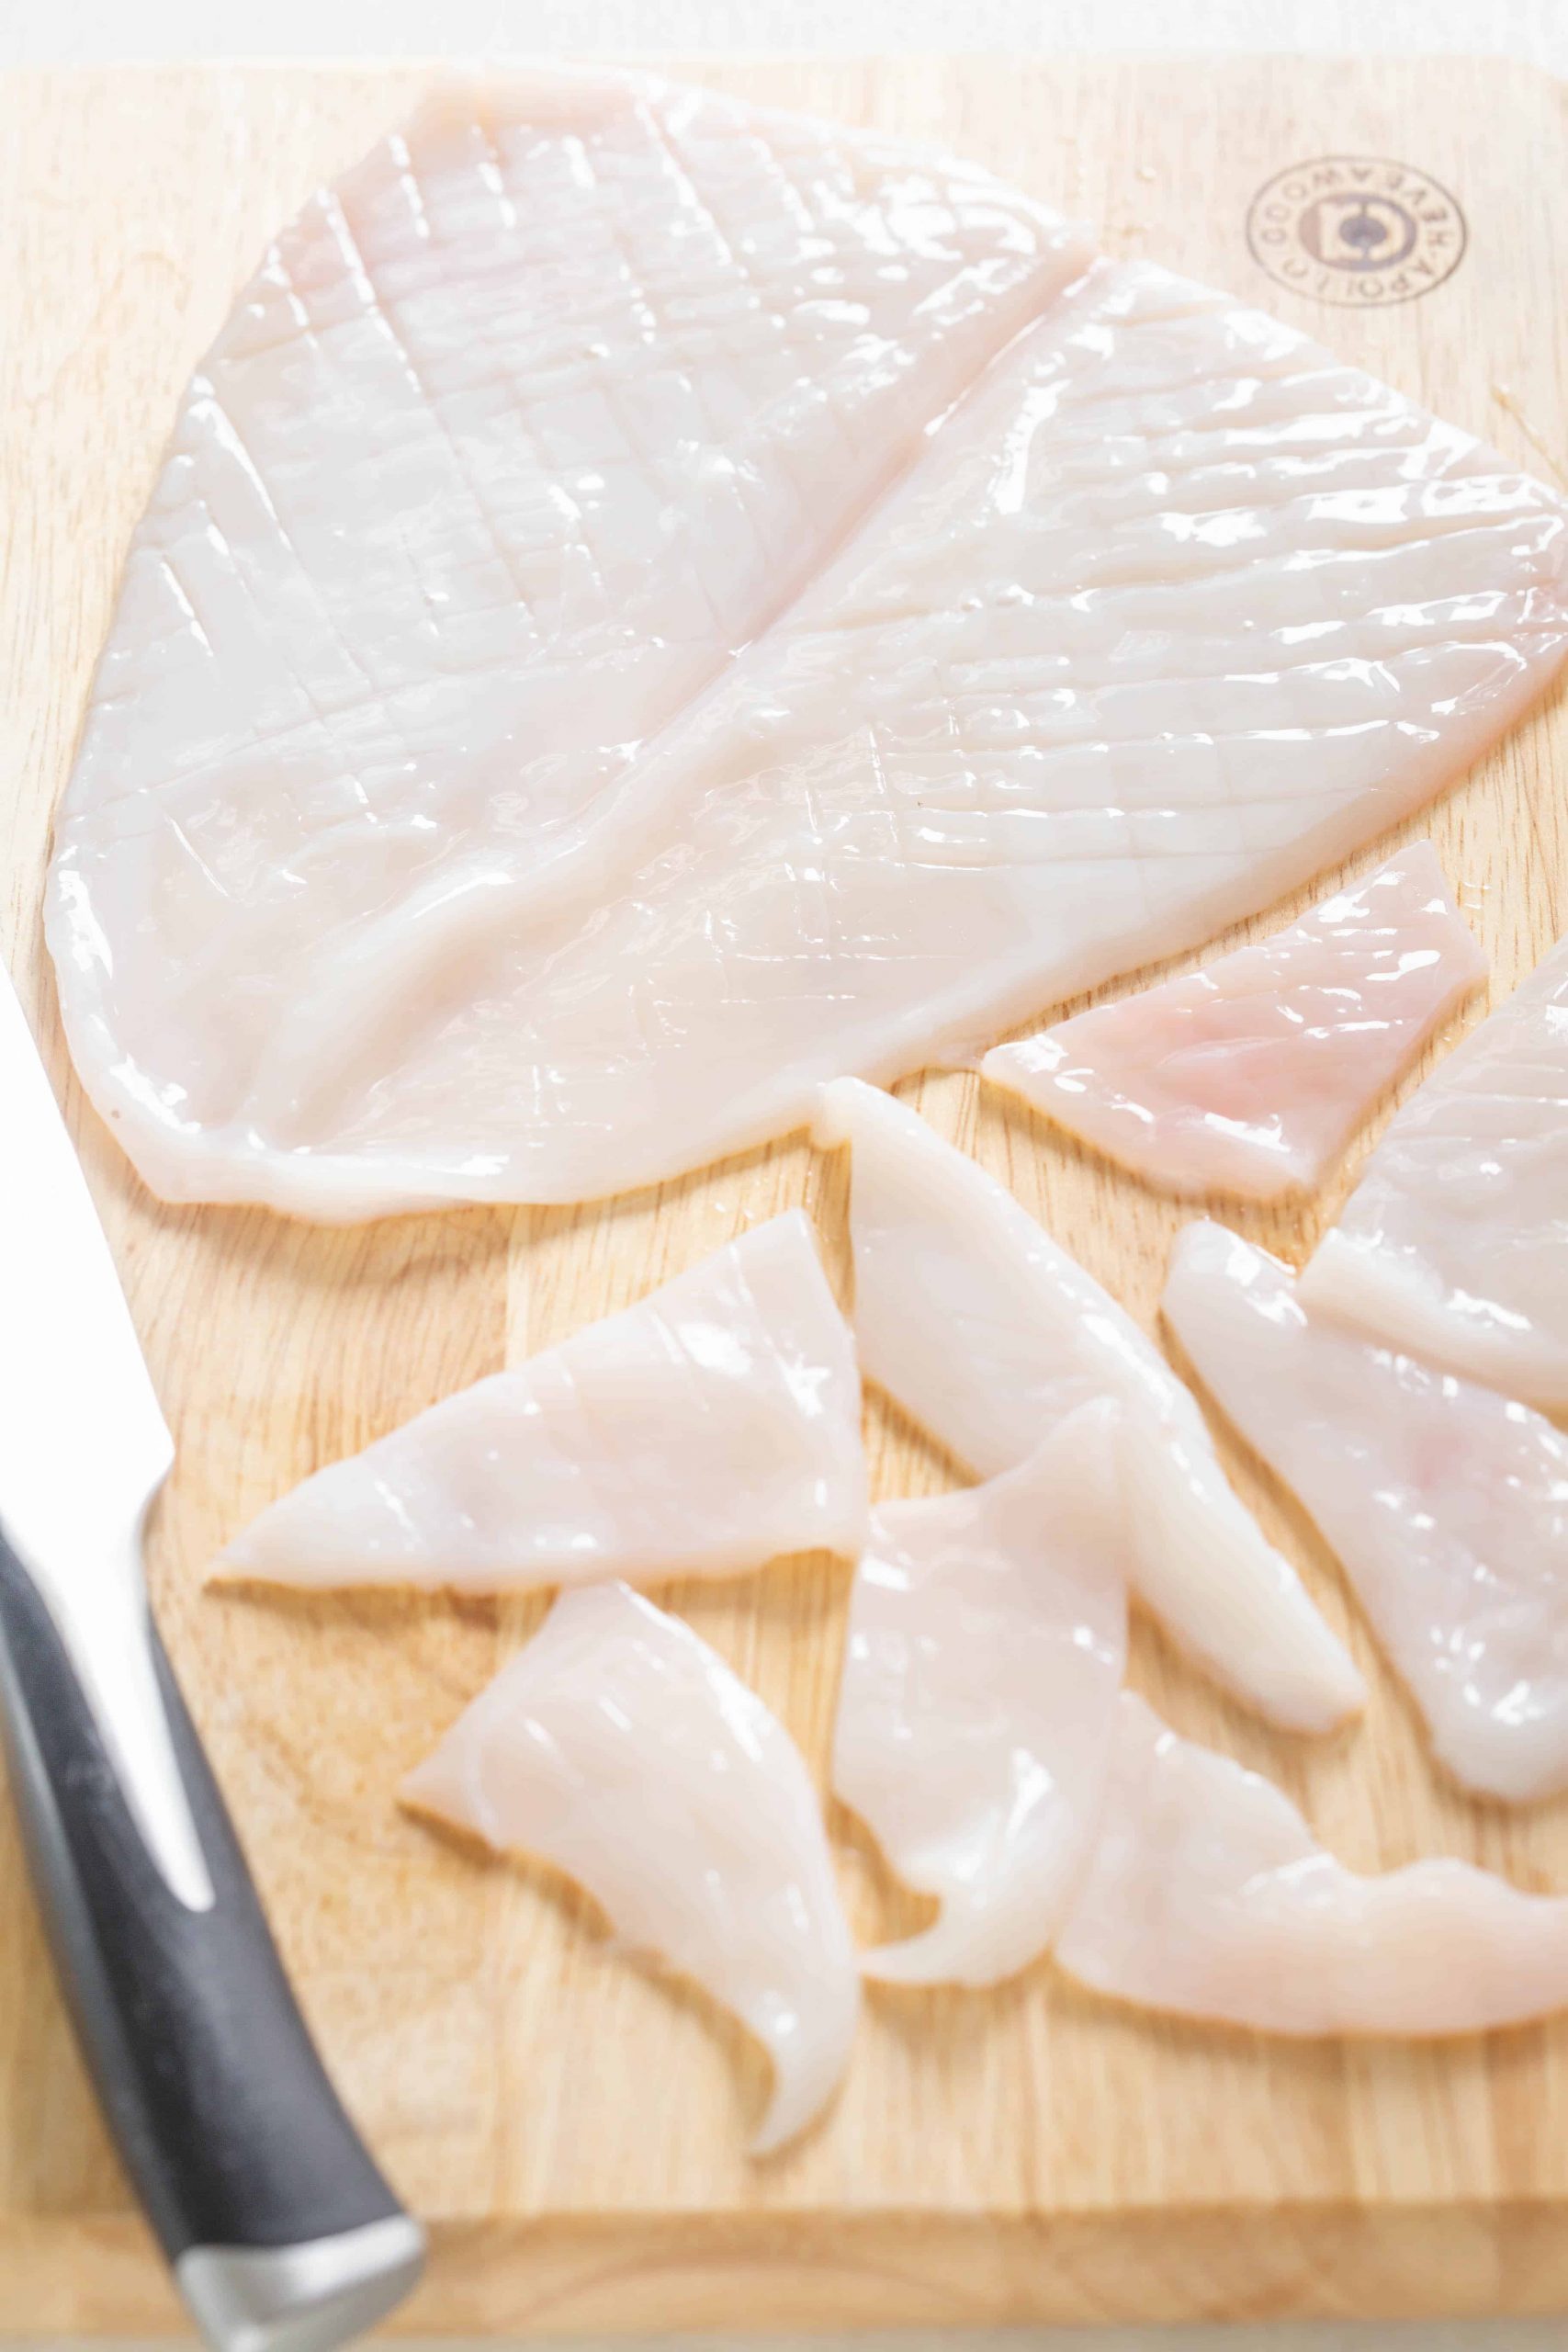
How to cut calamari so it curls
To make calamari that curls simply slice a freshly cleaned whole calamari tube down one side, on a chopping board. The calamari should now be lying flat. Using a very sharp knife to gently score the calamari diagonally across from each side, leaving a 1cm gap approximately between each scored line. Ensure not to pierce through the calamari fully. Repeat the process again on the same side but in the opposite direction, this will create little diamond pattens on the flesh. Once completed cut into a diamond shaped calamari pieces or strips. The diagonal criss-cross pattern will help the squid curl whilst deep frying, air frying, cooked in an oven, grilled, or sautéed
How to tell if squid is bad
There are a few signs to look out for to know whether squid has gone bad.
- Although fish naturally has a smell and can be slippery to touch, the squid should not be excessively smelling or slimy
- Another sign is if the squid is no longer white and has changed colour slightly to red/yellow
- If the squid is no longer shiny but dull this could also be a sign the squid has gone bad
Is calamari squid or octopus
Although similar in appearance calamari is not octopus. Calamari and fresh squid are also not the same often confused as just the Italian word / pronunciation. Squid and calamari are two different species with squid tending to be cheaper compared to calamari which is more expensive and more tender in texture.
How to bread calamari
Calamari can be breaded with various ingredients such as panko breadcrumbs, semolina flour, golden breadcrumbs, all-purpose flour, corn starch / cornflour, and rice flour. To get the breading / flour to stick to calamari you need to lightly cover the calamari in flour first then dip into an egg mixture before dipping into your chosen breadcrumbs or seasoned flour.
Can you cook calamari without flour?
Calamari can also be great without flour and served on its own with a marinade, sauteed in a frying pan with butter, olive oil or deep fried in hot oil with a gluten free flour coating as a substitute for dietary needs.
How long to cook calamari
One of the worst things you can do is overcooking calamari as it can become very chewy. Cooking calamari at a high temperature with a short cooking time will ensure its tender when eating. For this air fryer recipe, the fresh coated calamari pieces are air fried for 6-7 minutes at 374 degrees f /190°C. The size of the pieces are quite small so you would need to increase the cook time if you cut them larger. When cooking frozen calamari, you will need to increase the length of cooking time.
Air Fryer Salt & Pepper Calamari Recipe
Copycat salt and pepper calamari can be made at home as a fakeaway recipe that tastes pretty close to the version from Chinese restaurants. This Chinese seasoning can be found on wings, chips, king prawns, chicken thighs, and calamari. You will need the following key ingredients to make at home:
Squid
- Fresh whole small squid tubes / calamari tubes or Fresh squid ring
- Fish Sauce
- Shaoxing wine
- Egg whites
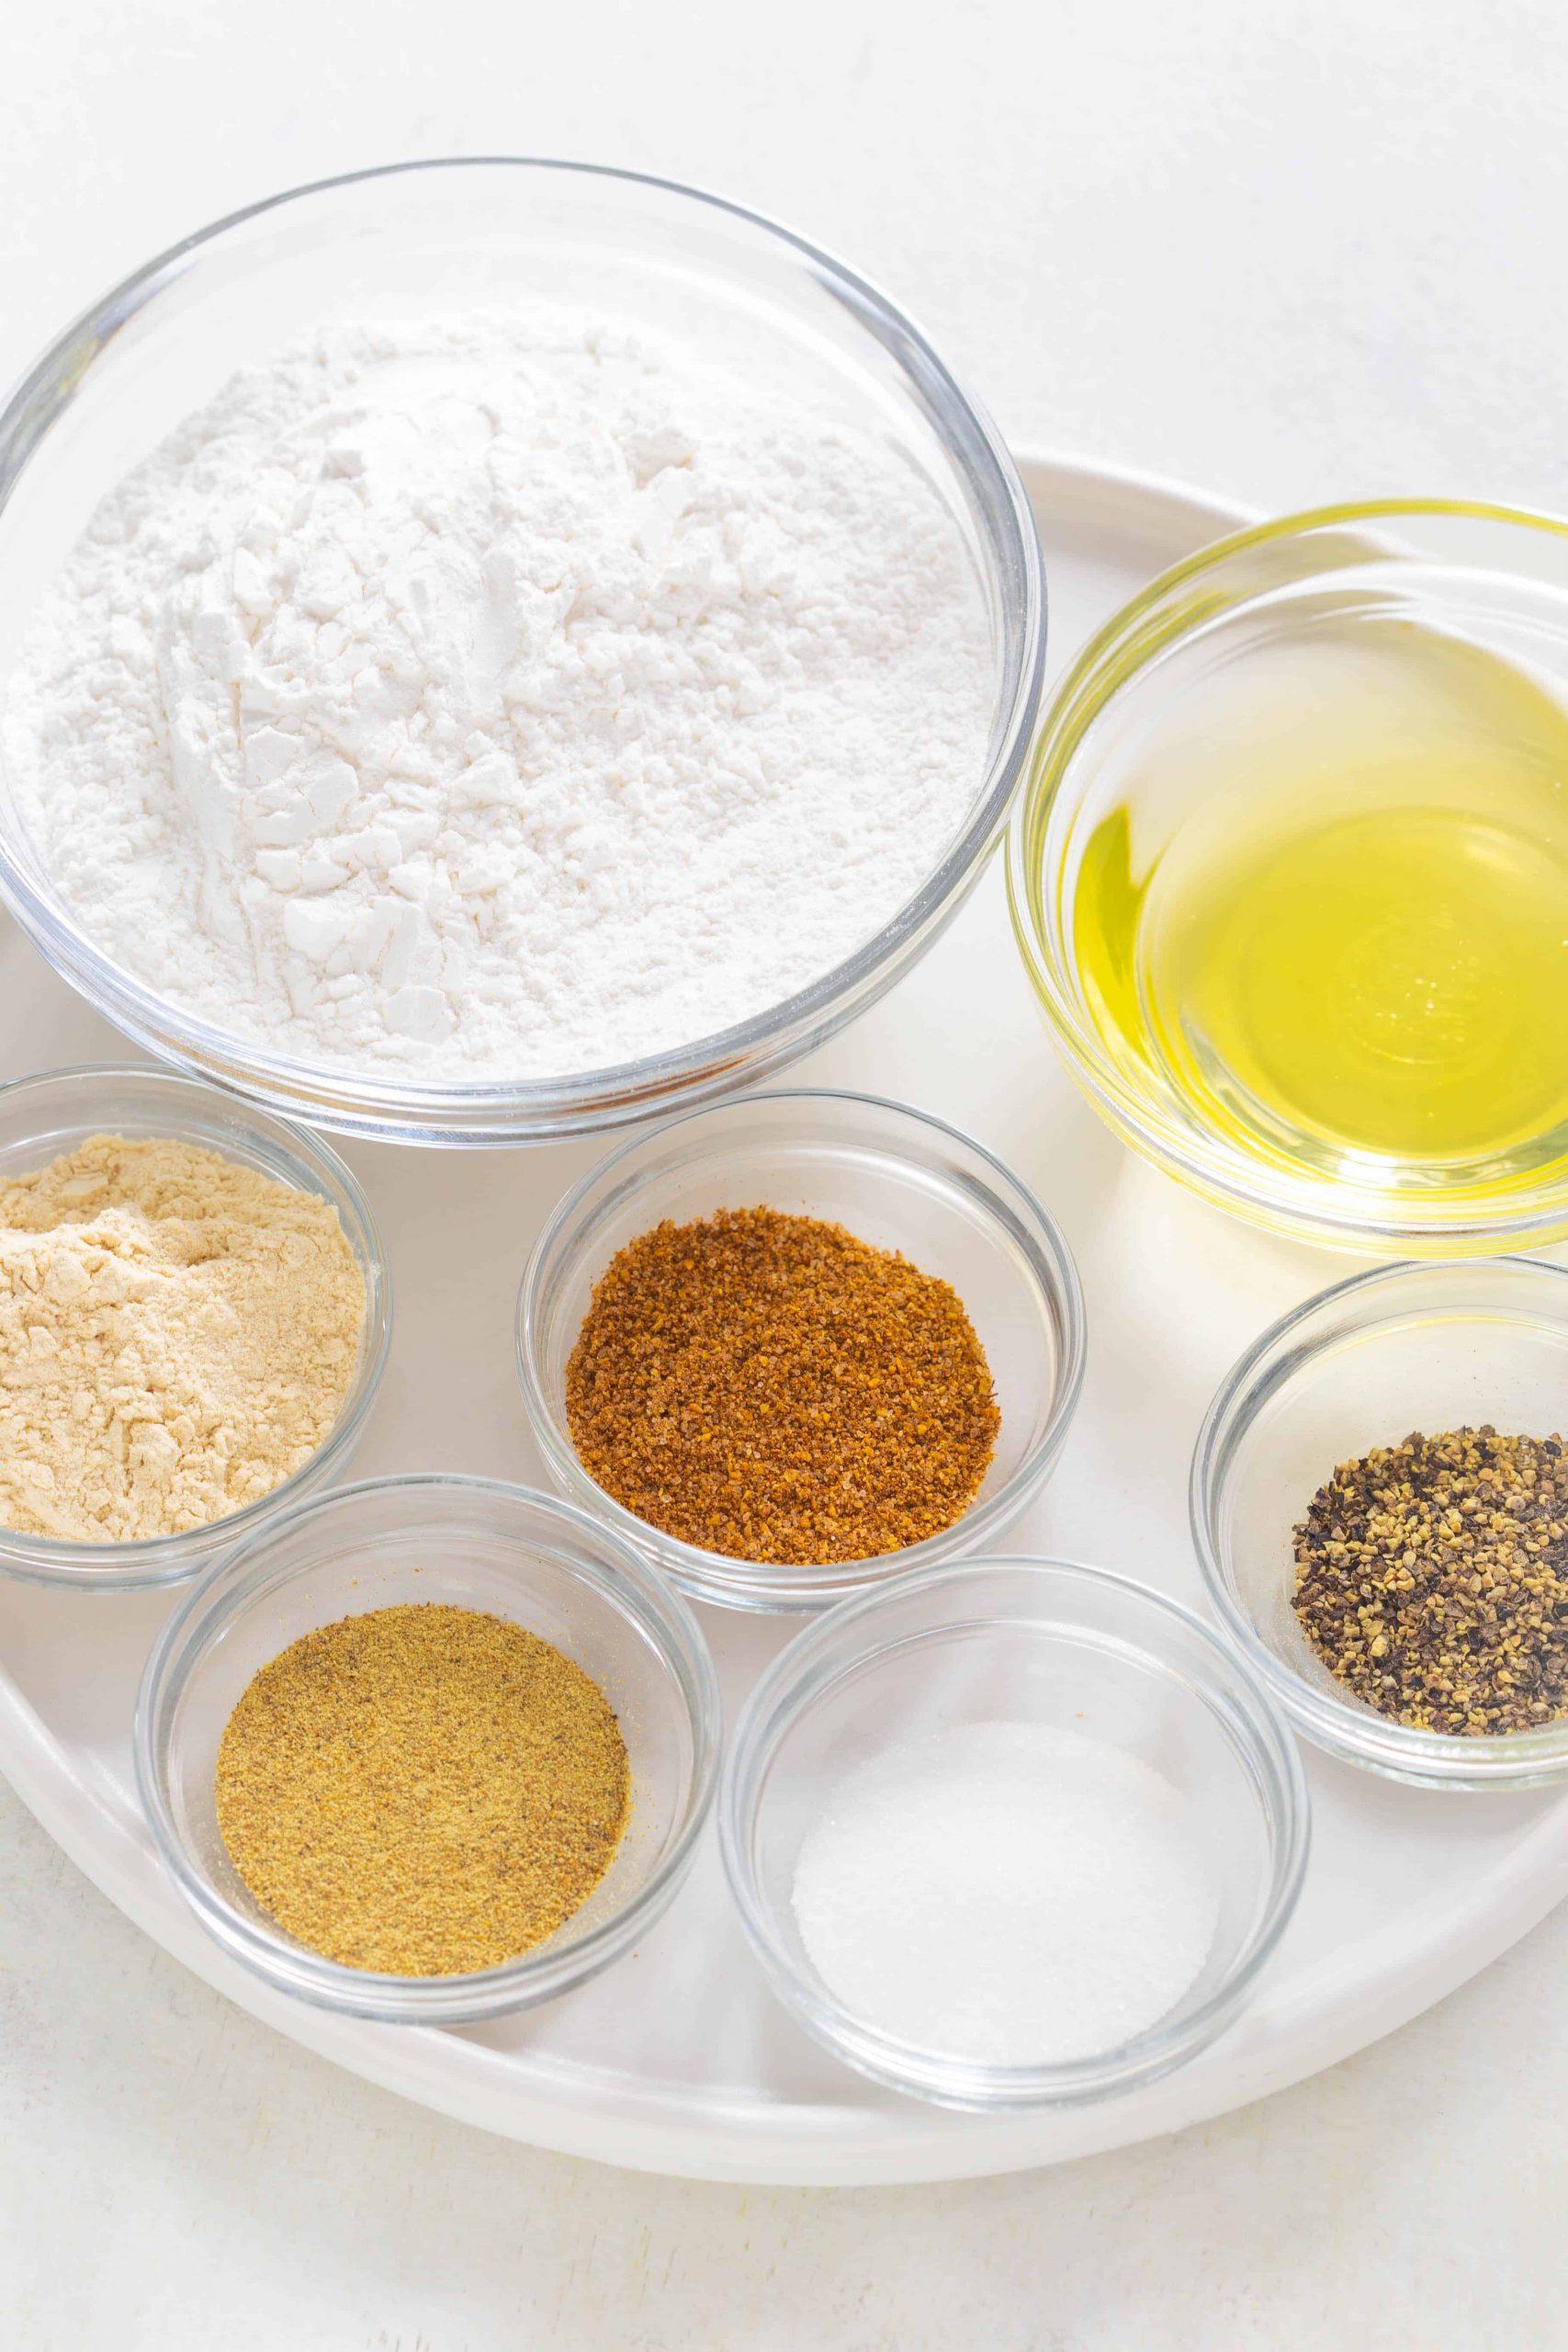
Seasoned salt & pepper flour
- Rice flour
- White pepper
- Ground black pepper (or ground Sichuan peppercorns)
- Garlic powder
- Chinese 5 spice
- Salt
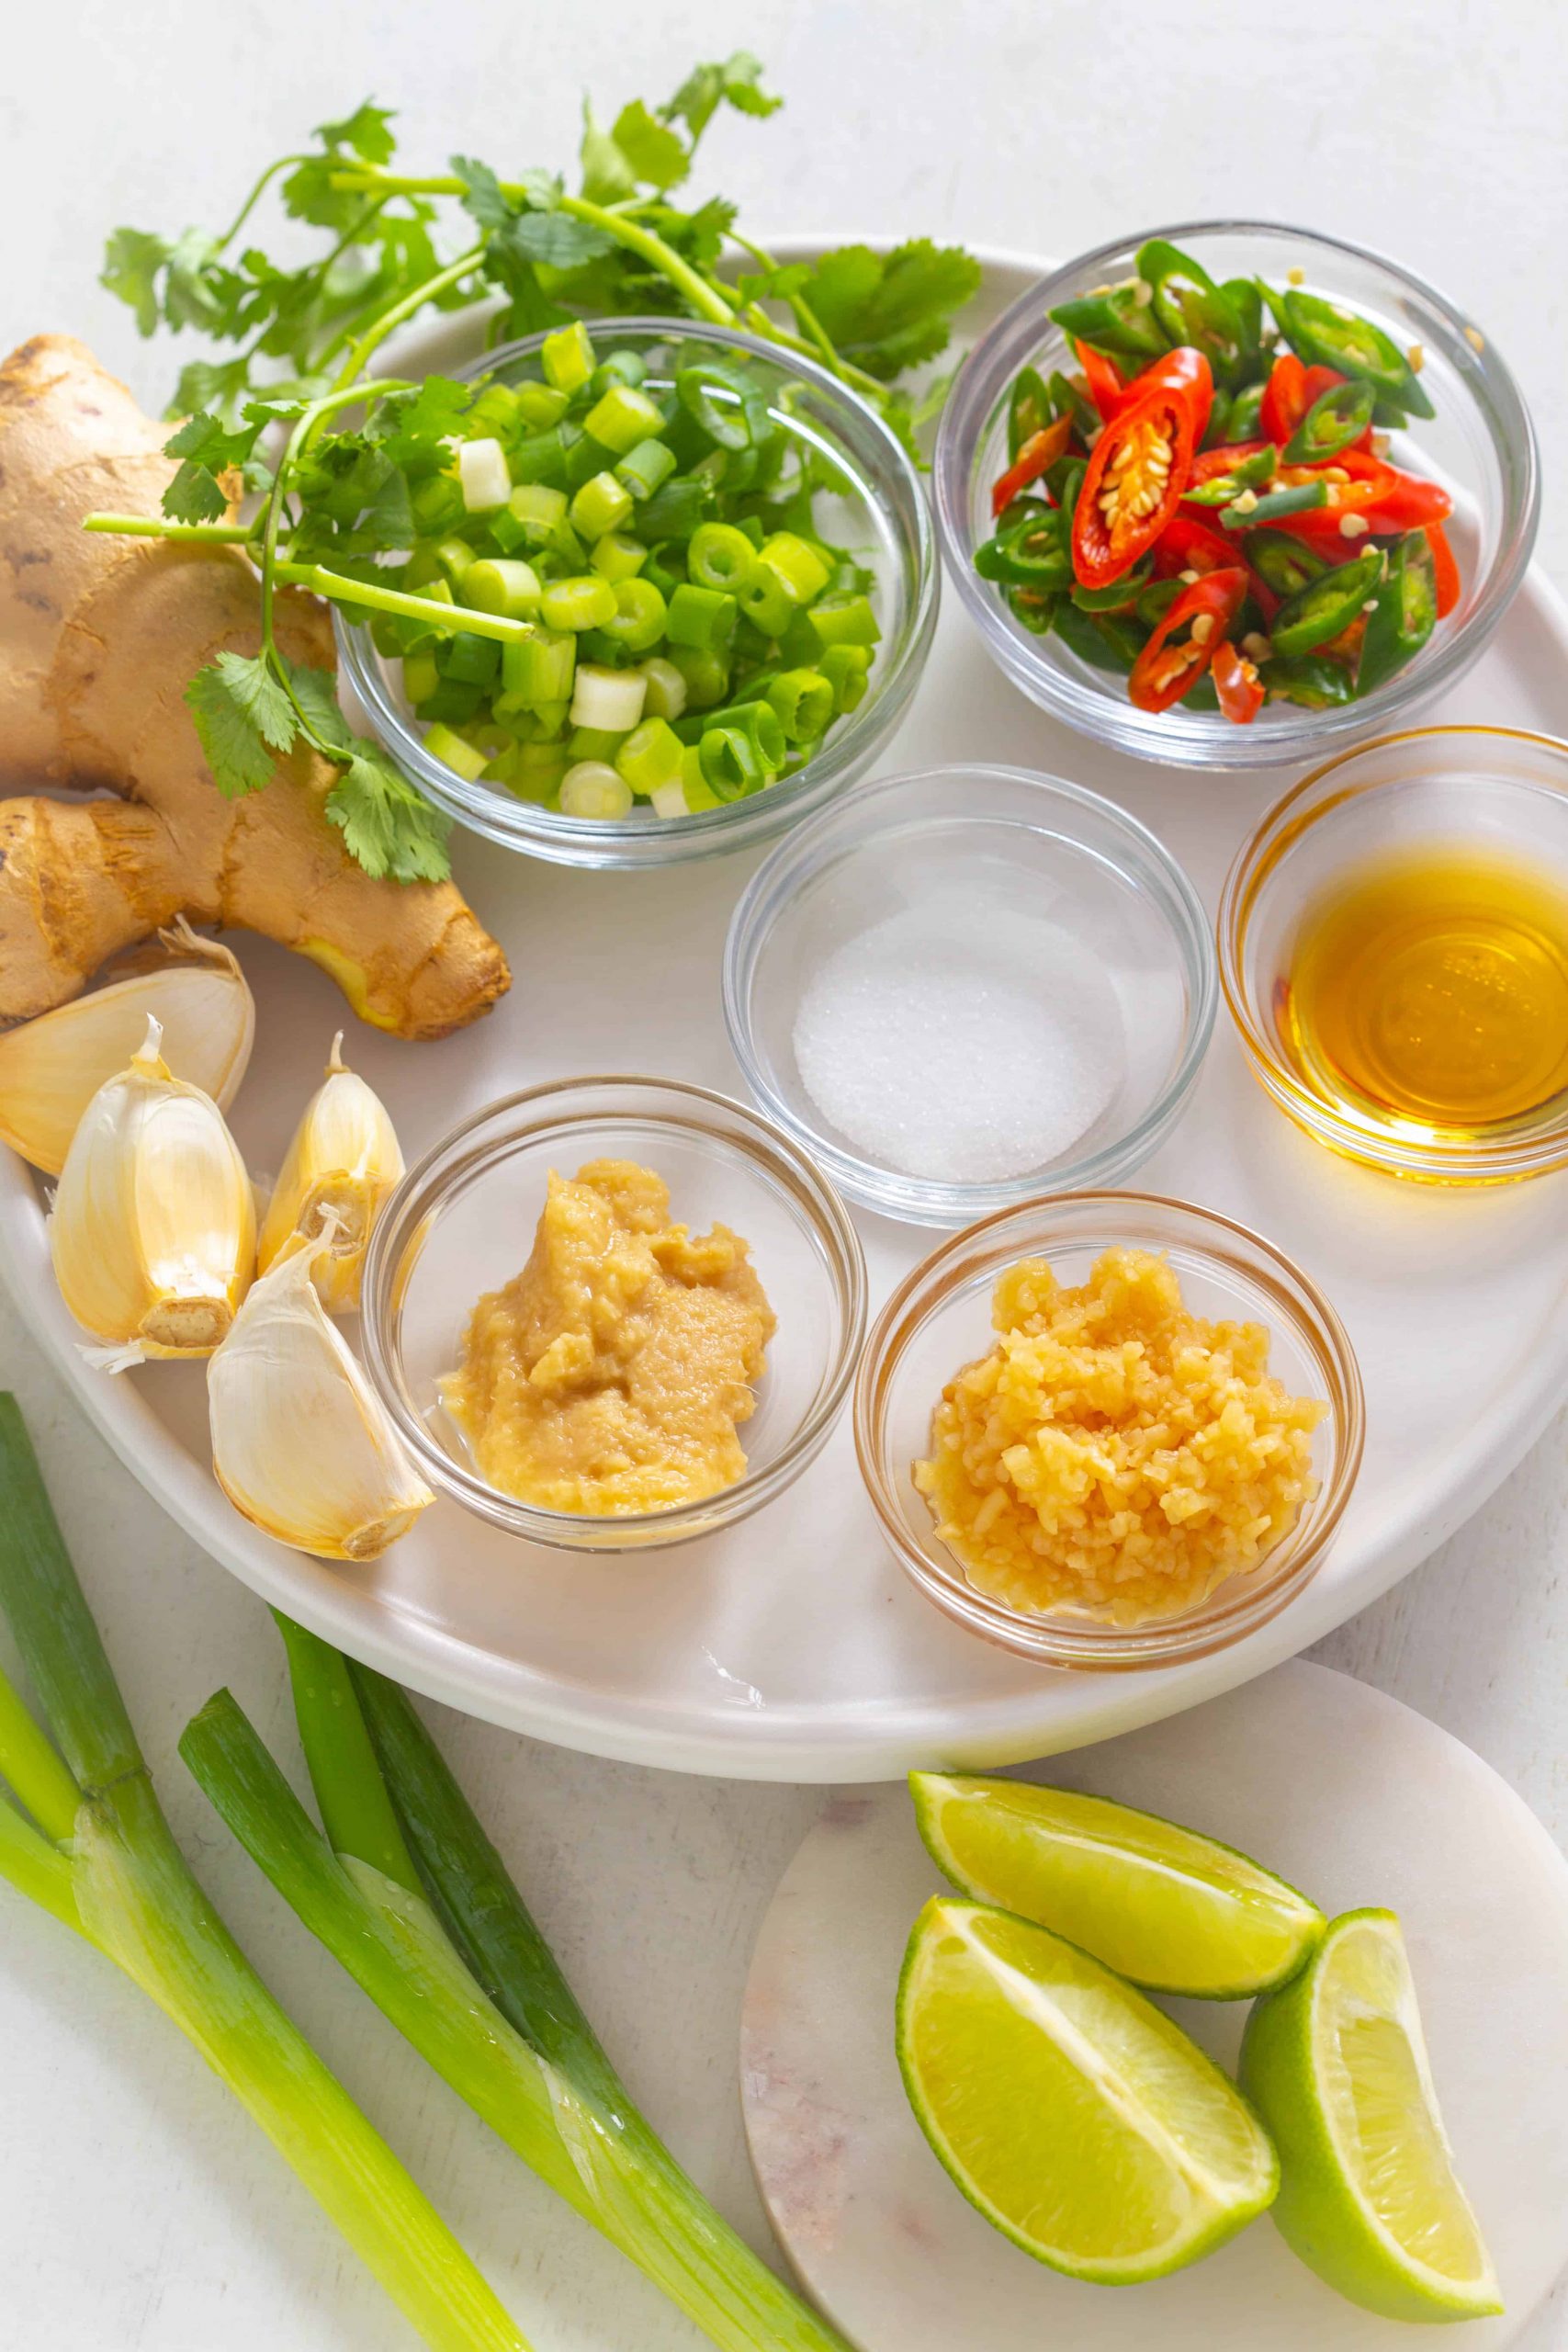
Salt & Pepper Stir fry Vegetables
- Fresh garlic minced
- Spring onions / green onions
- Red & Green chillies
- Sesame seed oil
- Salt
Garnishes
- Lime wedges, sweet chilli sauce and fresh herbs (coriander)
How to make calamari in the air fryer
Preparing calamari: Clean, prep and cut squid tubes (if purchased whole) into your desired shape, either a diamond pattern or squid rings. *Check the recipe notes for tips
Marinating calamari: Place the calamari into a shallow bowl, add Shaoxing wine, fish sauce, and stir.
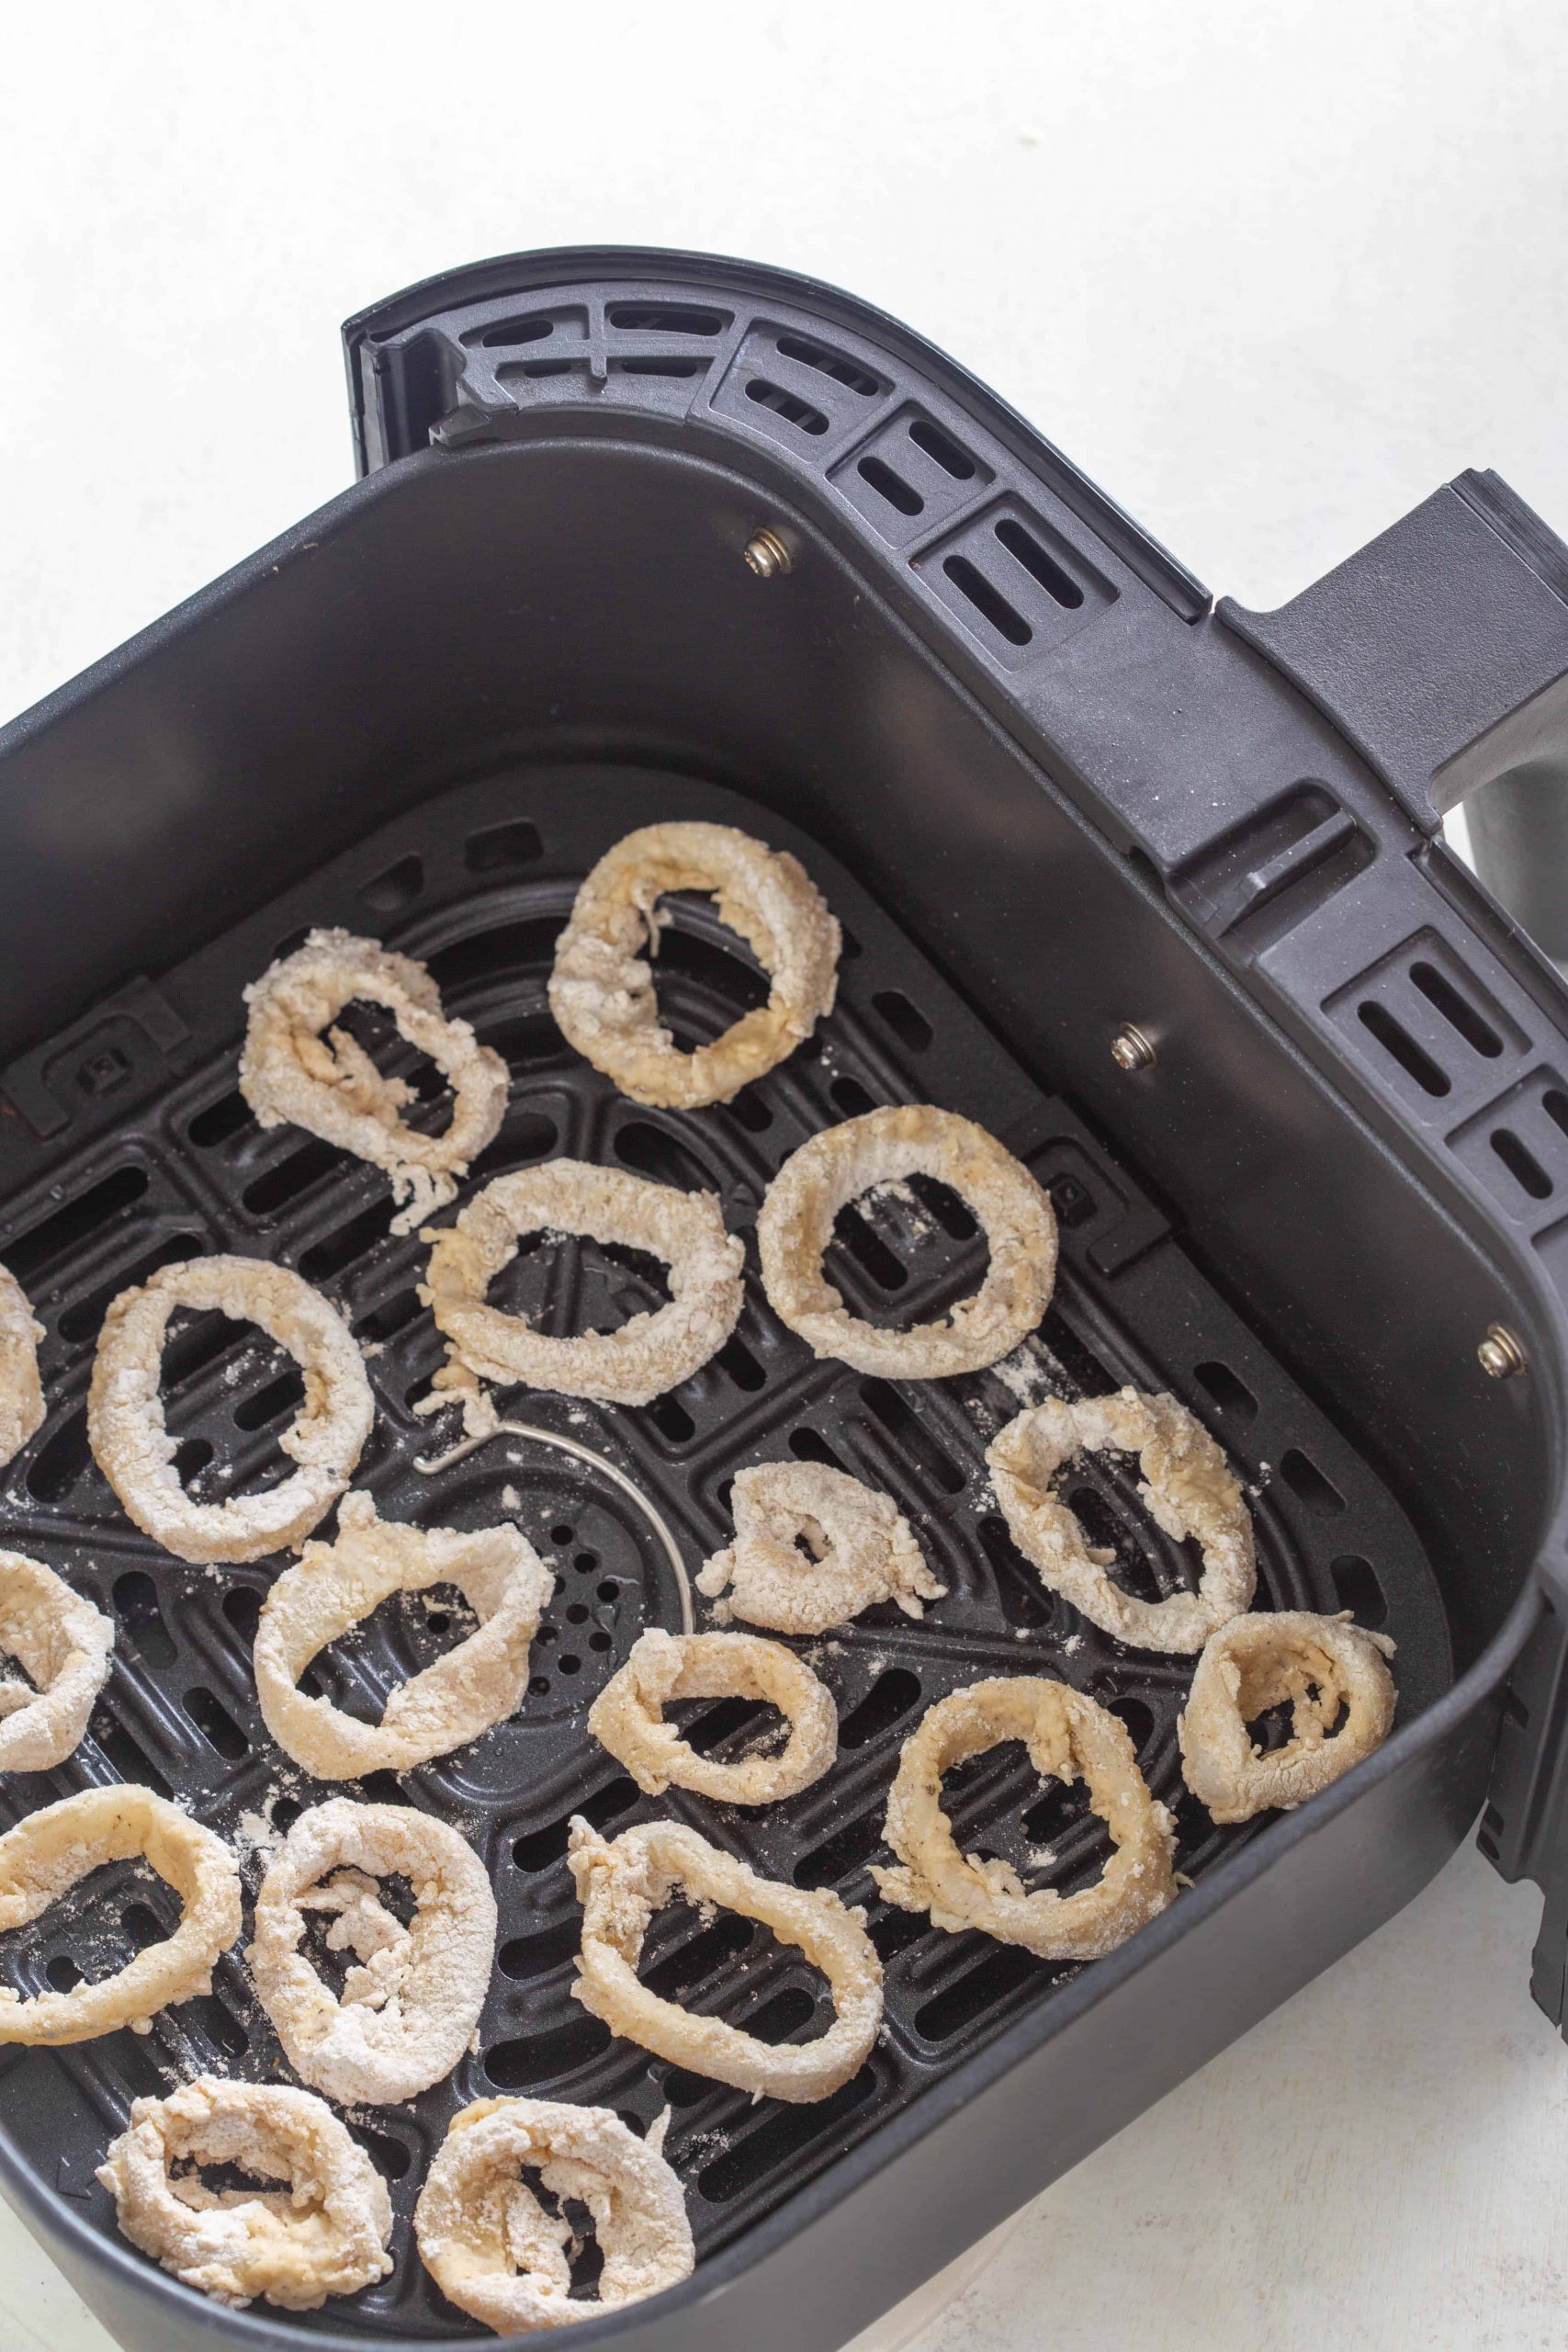
Dredging: In a separate bowl mix together all the seasoned flour mixture ingredients. Add a handful of the marinated calamari pieces into the bowl, using your hands to coat each piece. Then dip the floured calamari into a bowl of whisked egg whites and finally dredge again in the seasoned flour mixture. The double coating will help to fully cover the calamari. Place them on a greased wire rack as you will need to do this process in batches
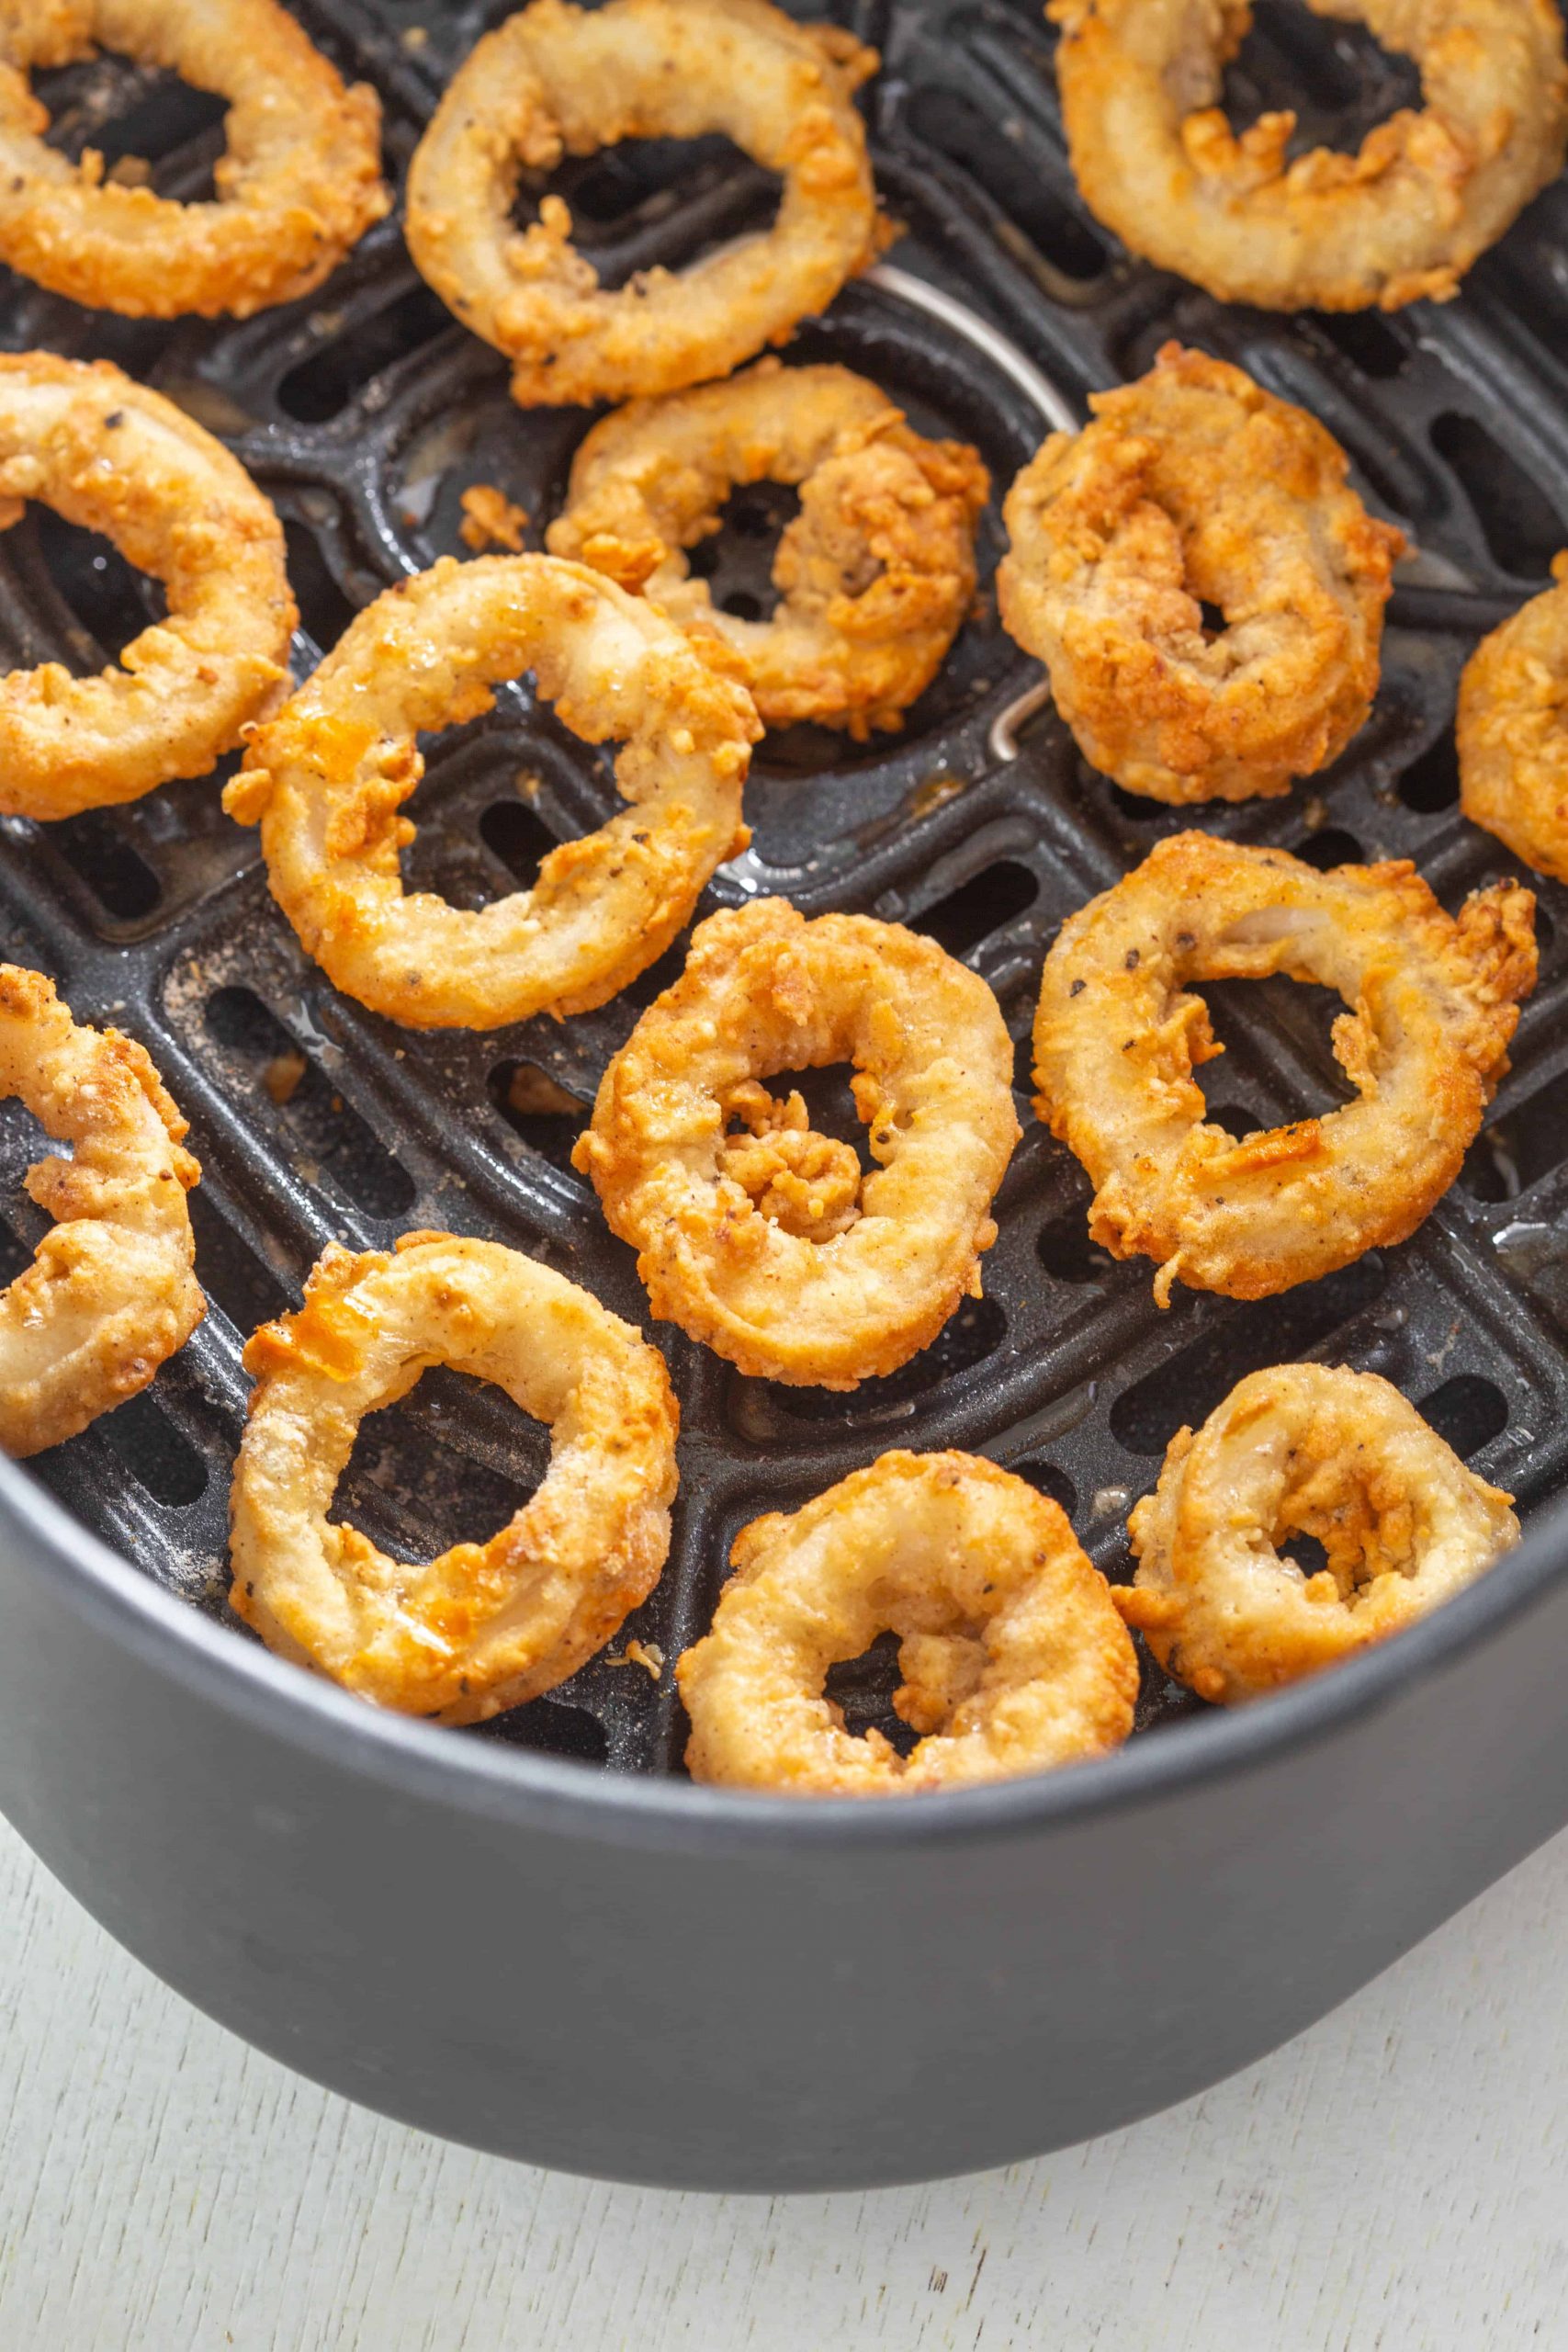
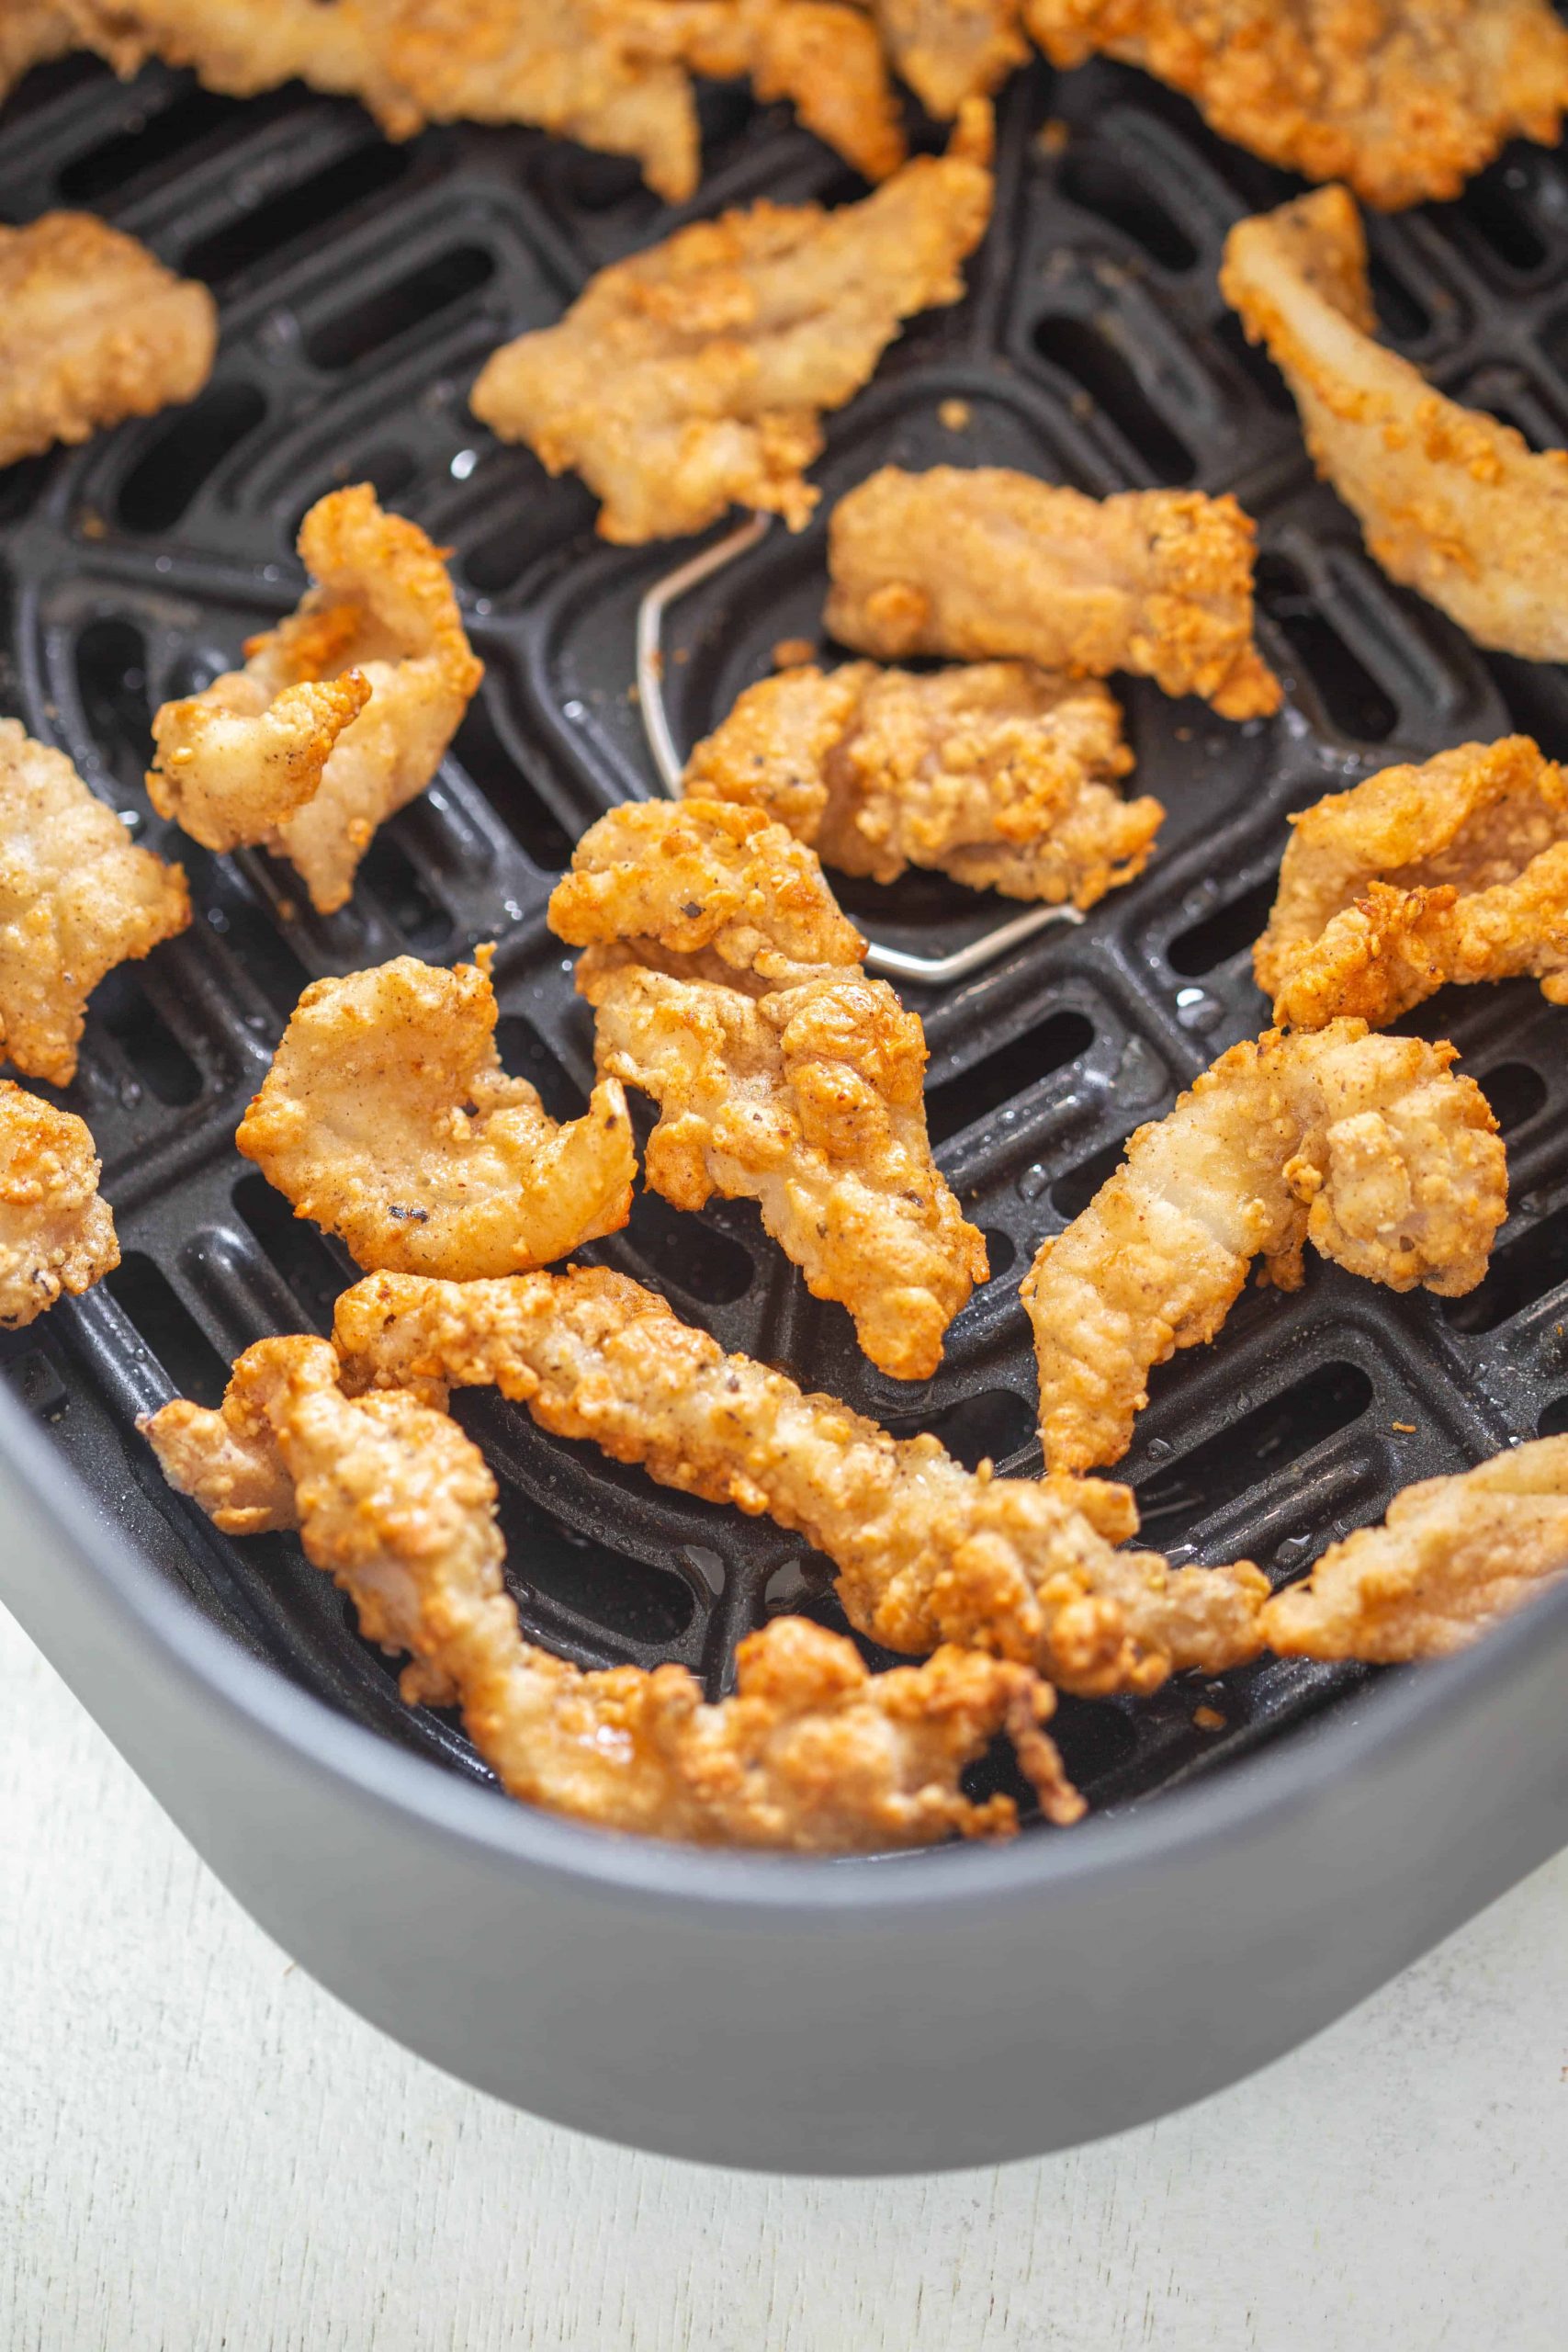
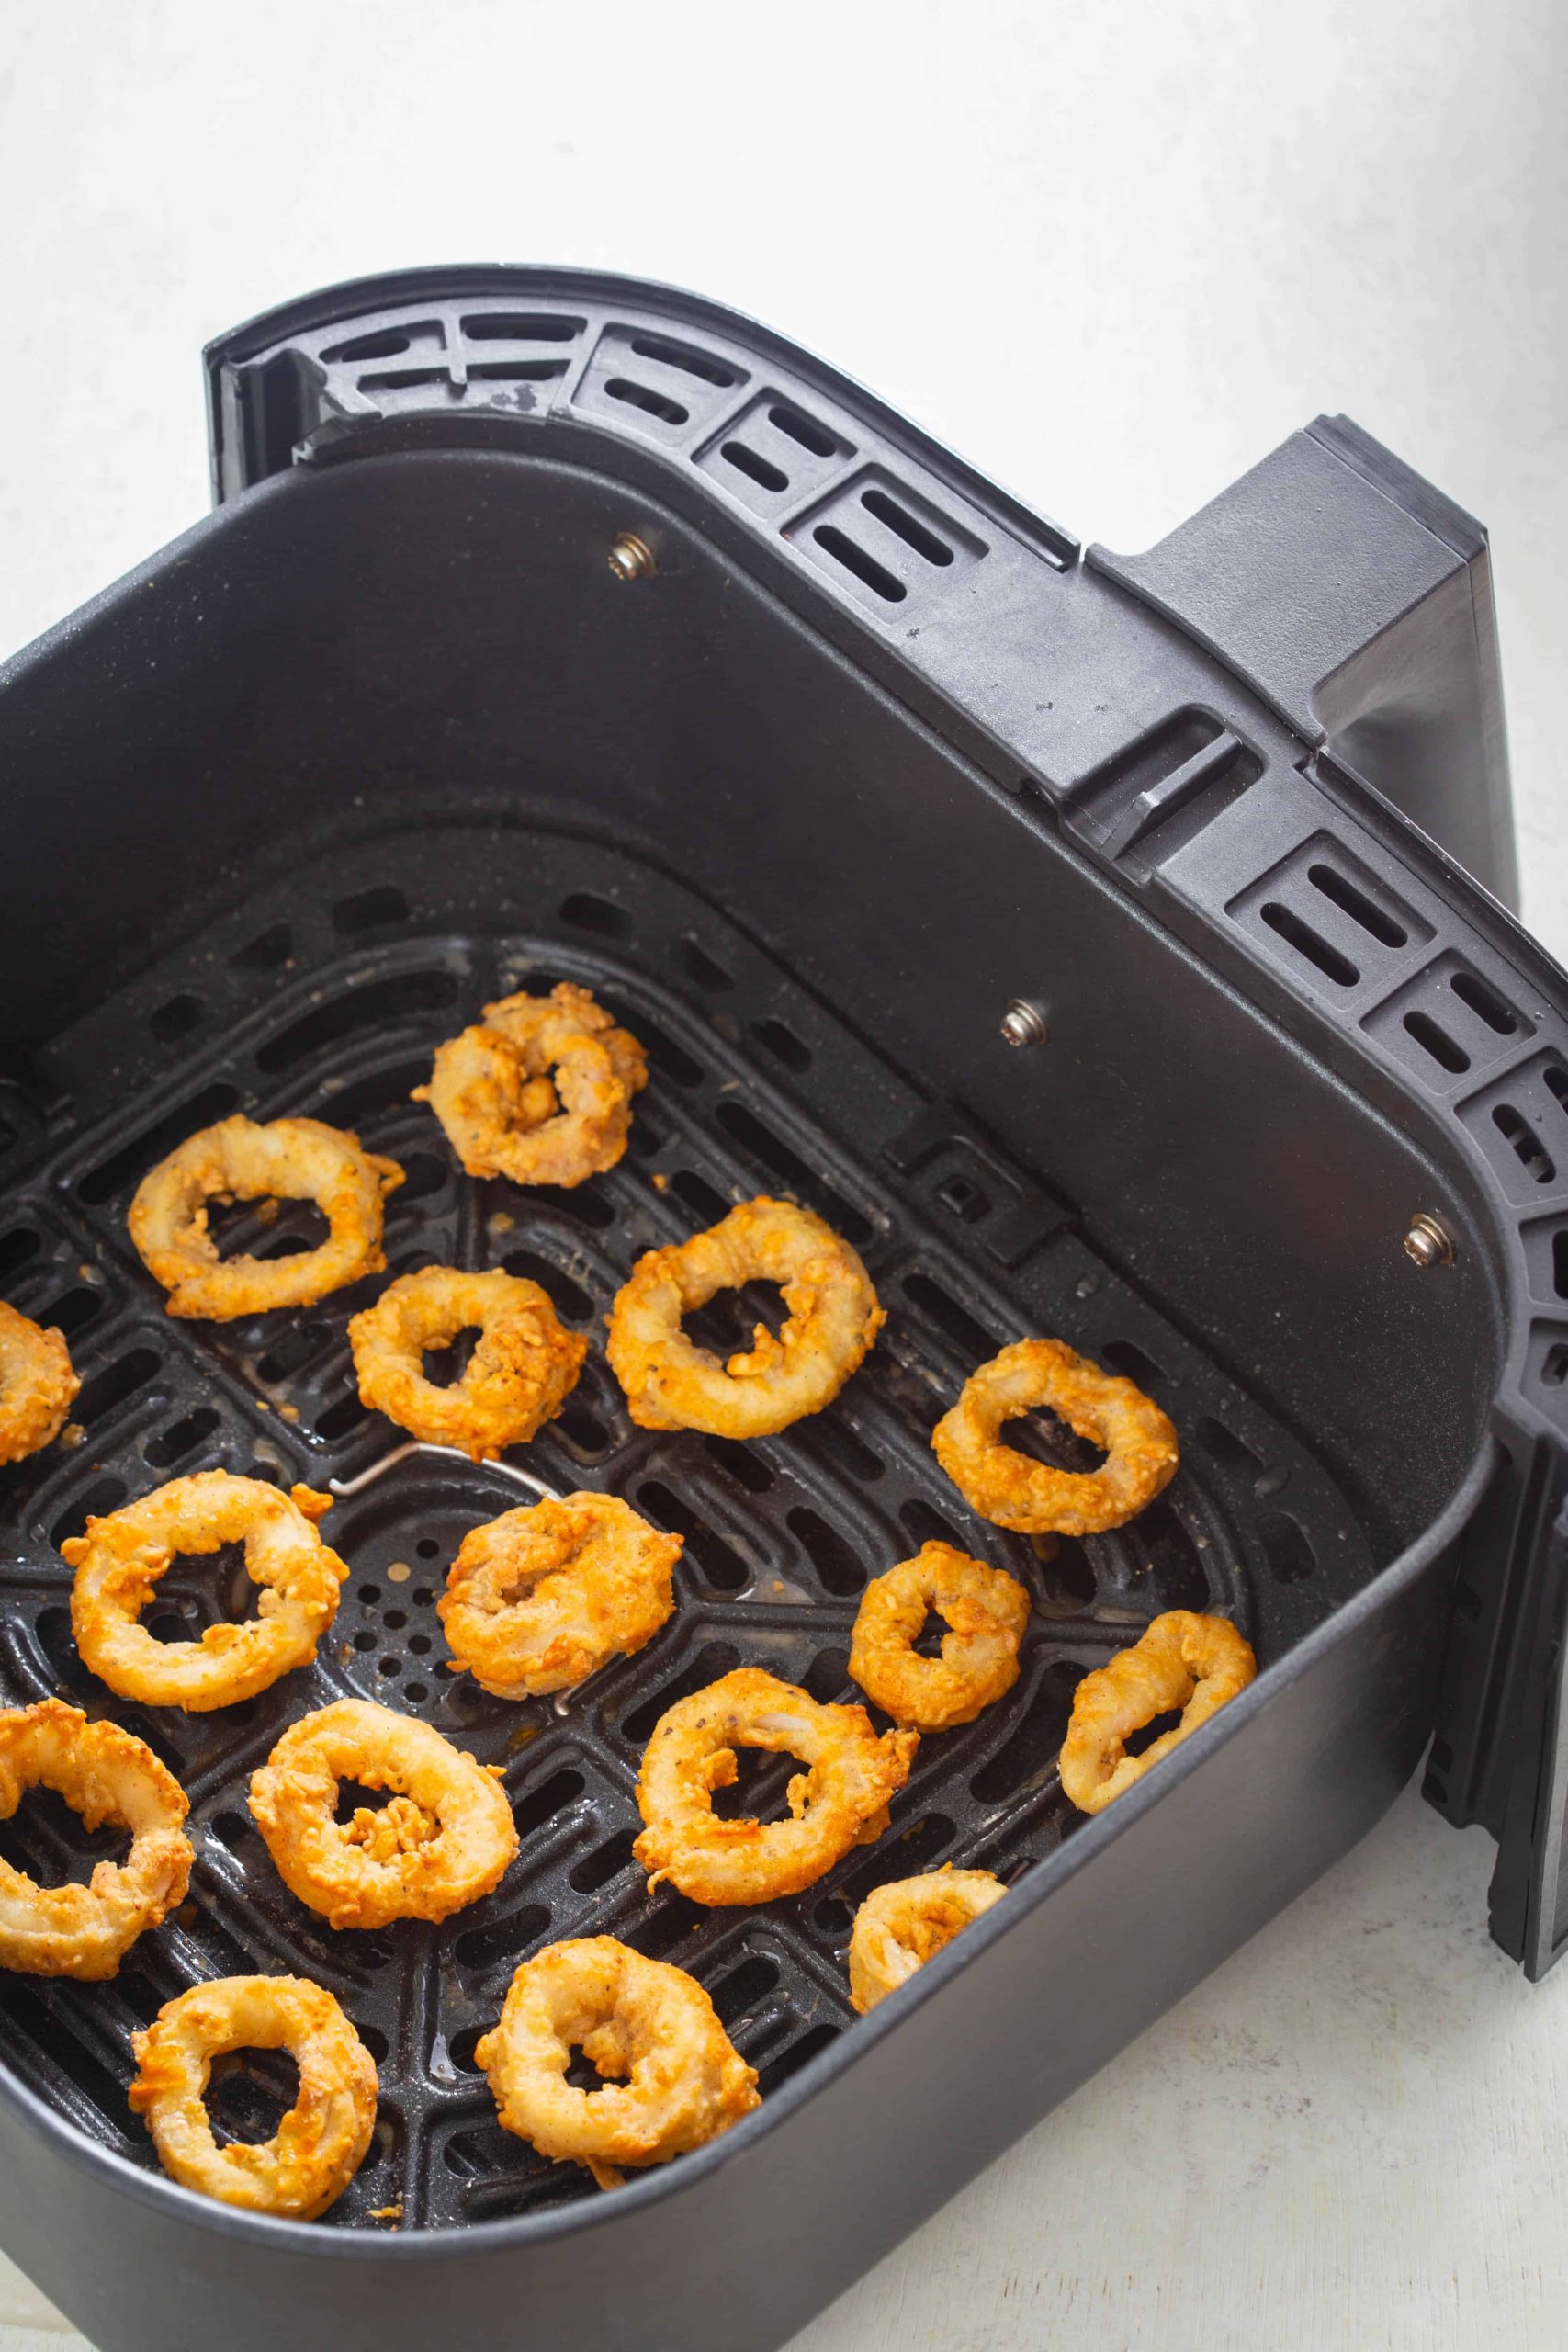
Air frying calamari: Add to the calamari into the air fryer basket in a single layer, use a nonstick cooking spray or brush with oil to generously cover the floured calamari. Air fry for 5 minutes at 375 °F /190°C, flip over and then air fryer for a further 2 minutes.
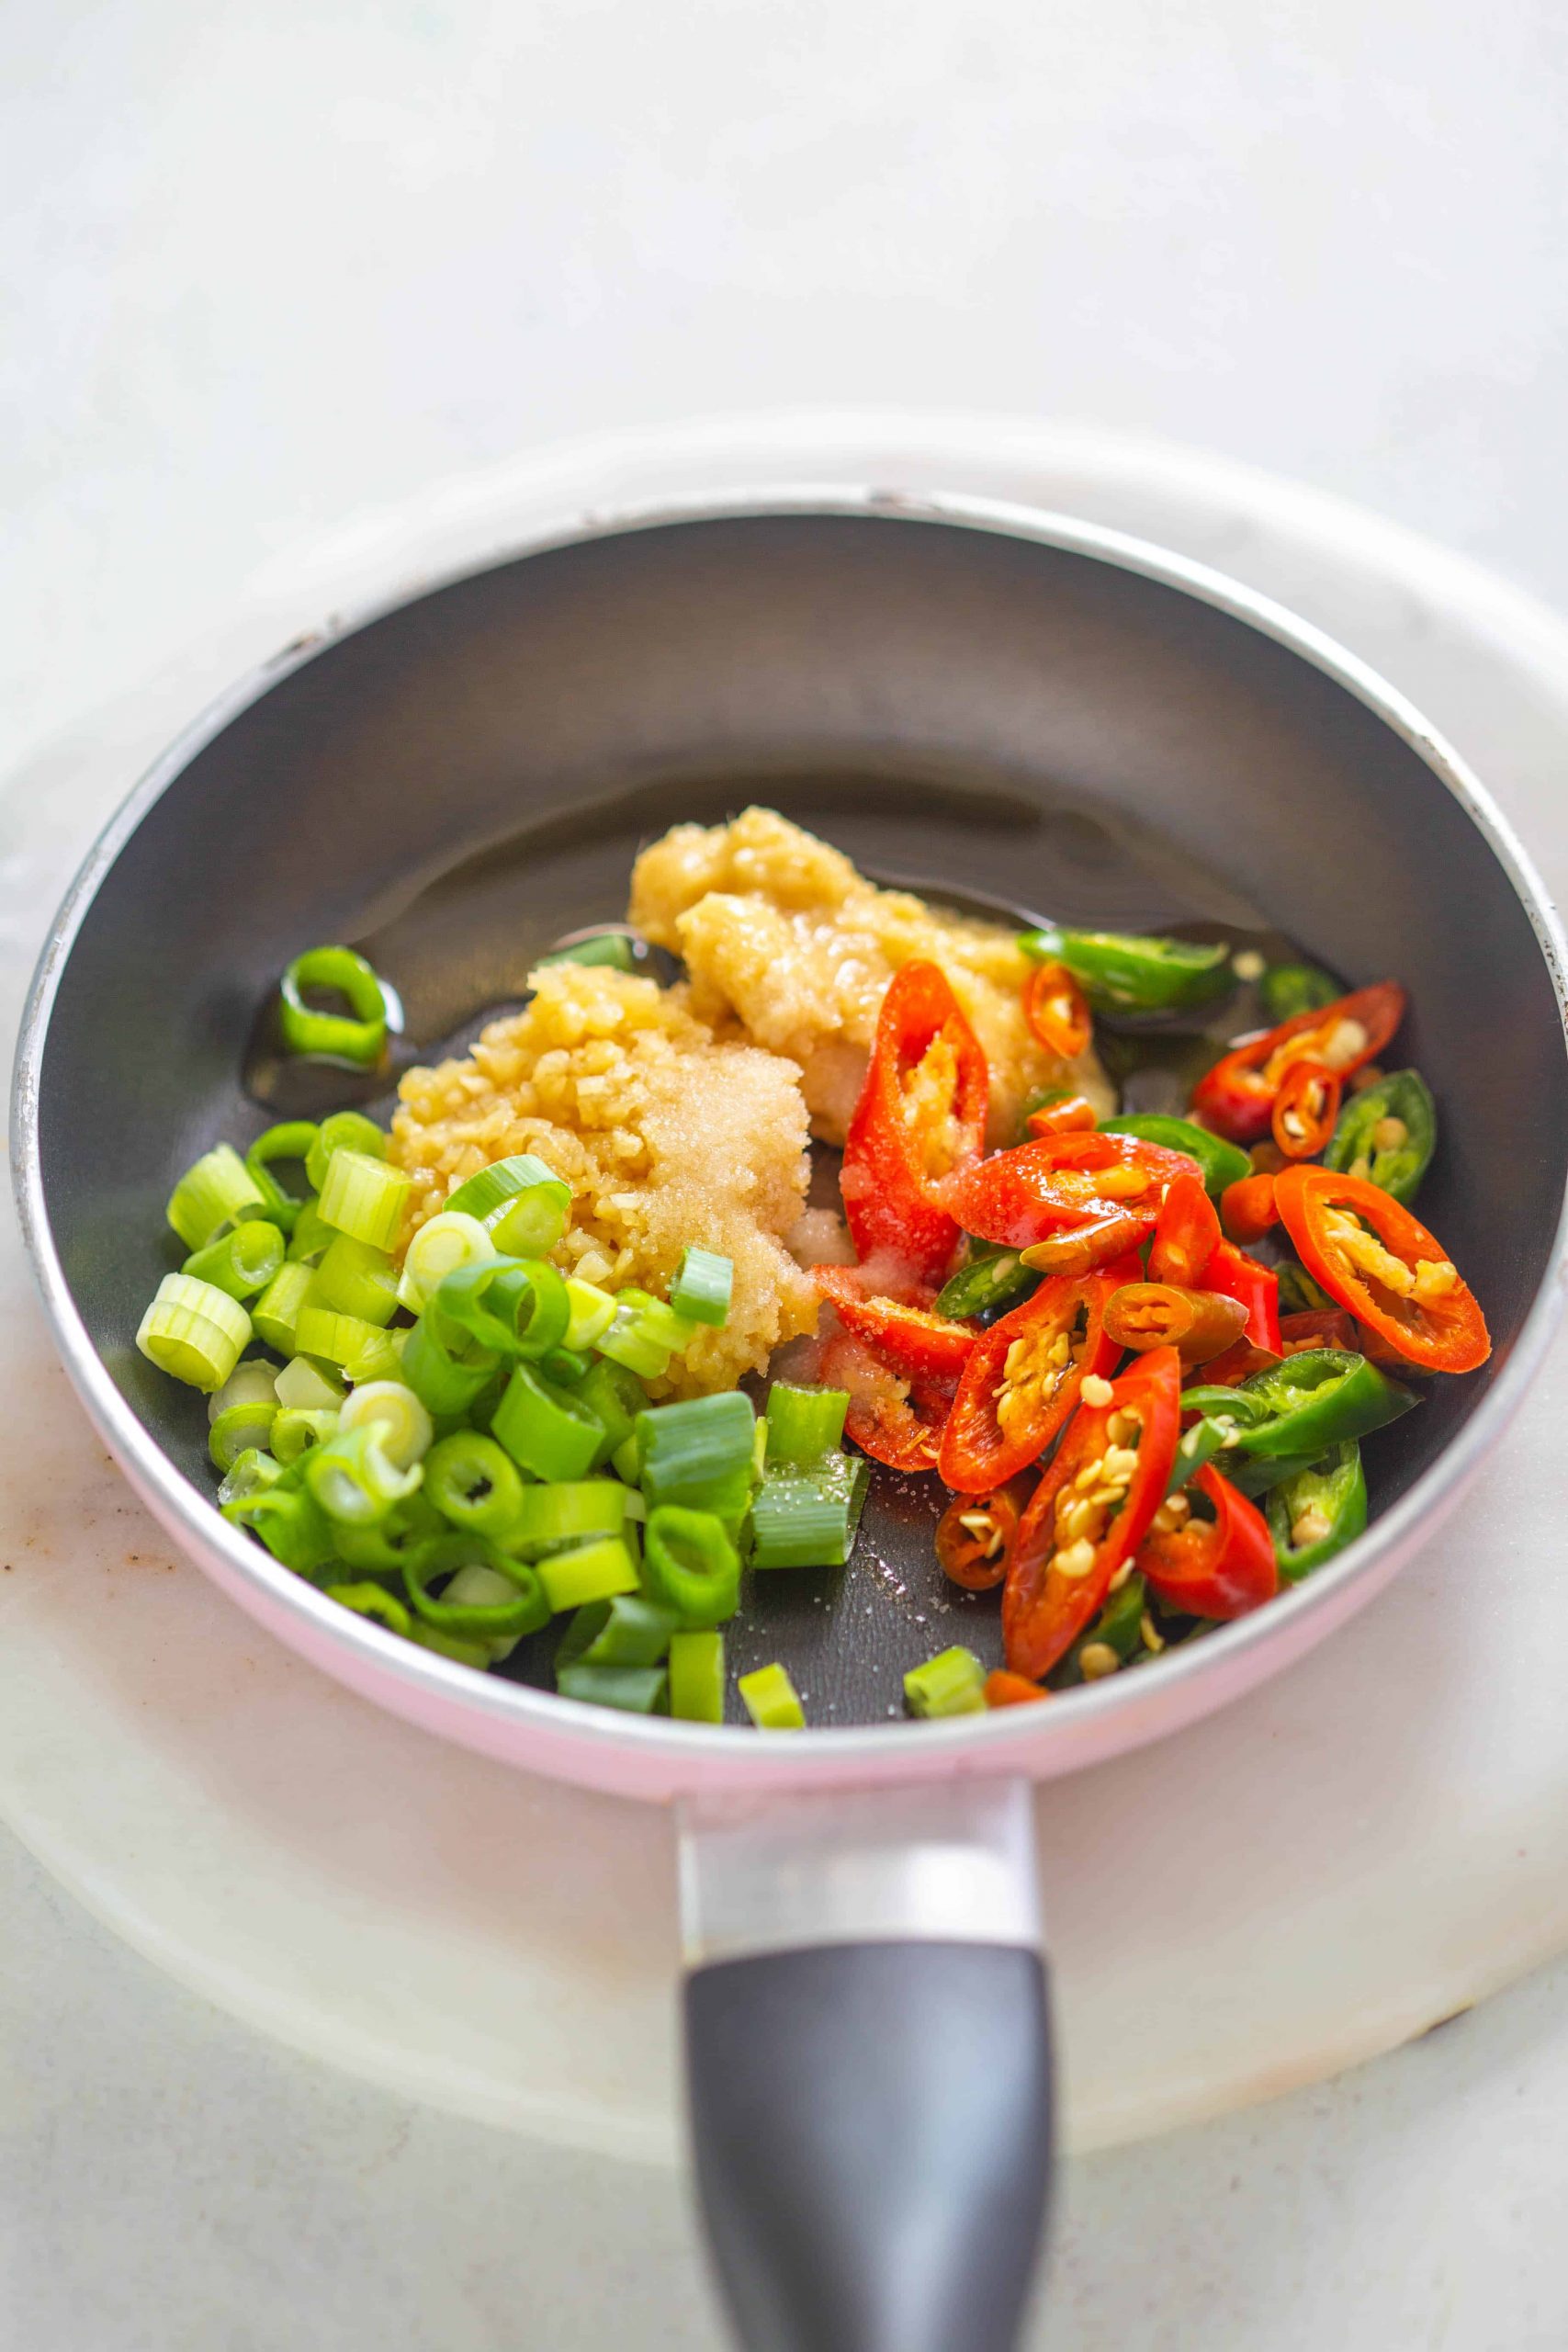
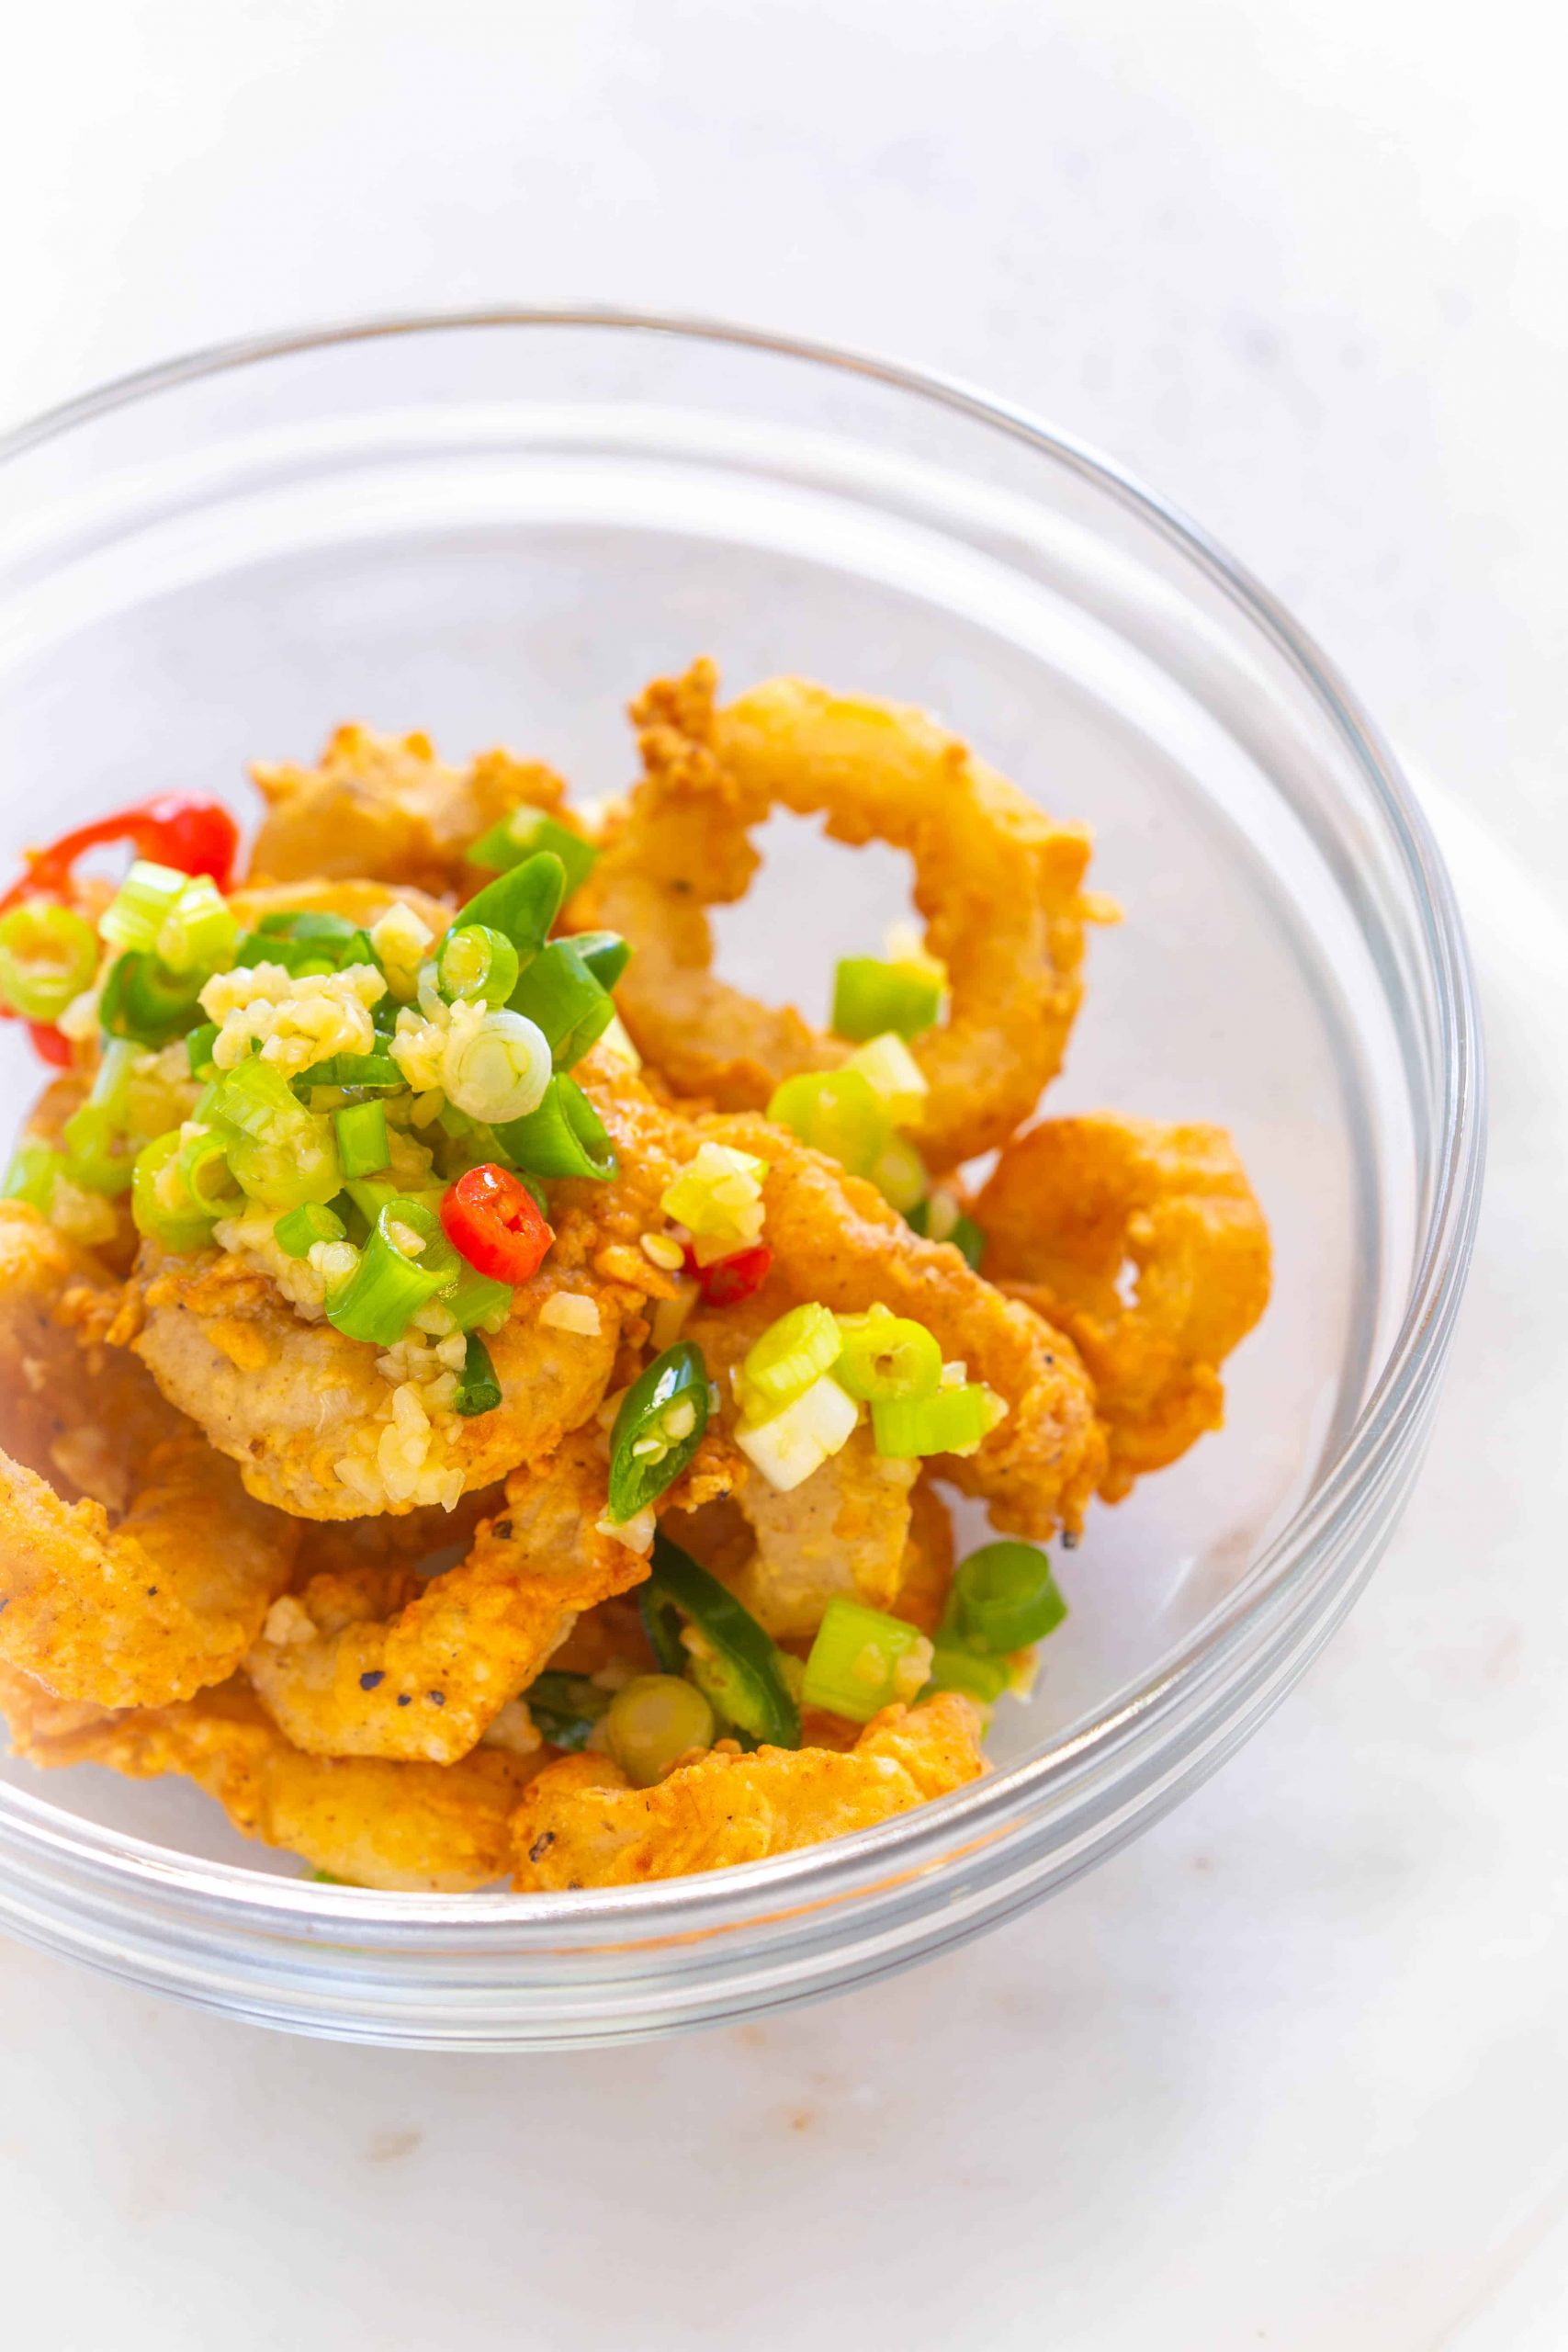
Salt & Pepper Stir fry Vegetables: Place a small frying pan onto the stove at a medium heat. Pour in some sesame oil and stir fry the 2 minutes, adding the green onions last.
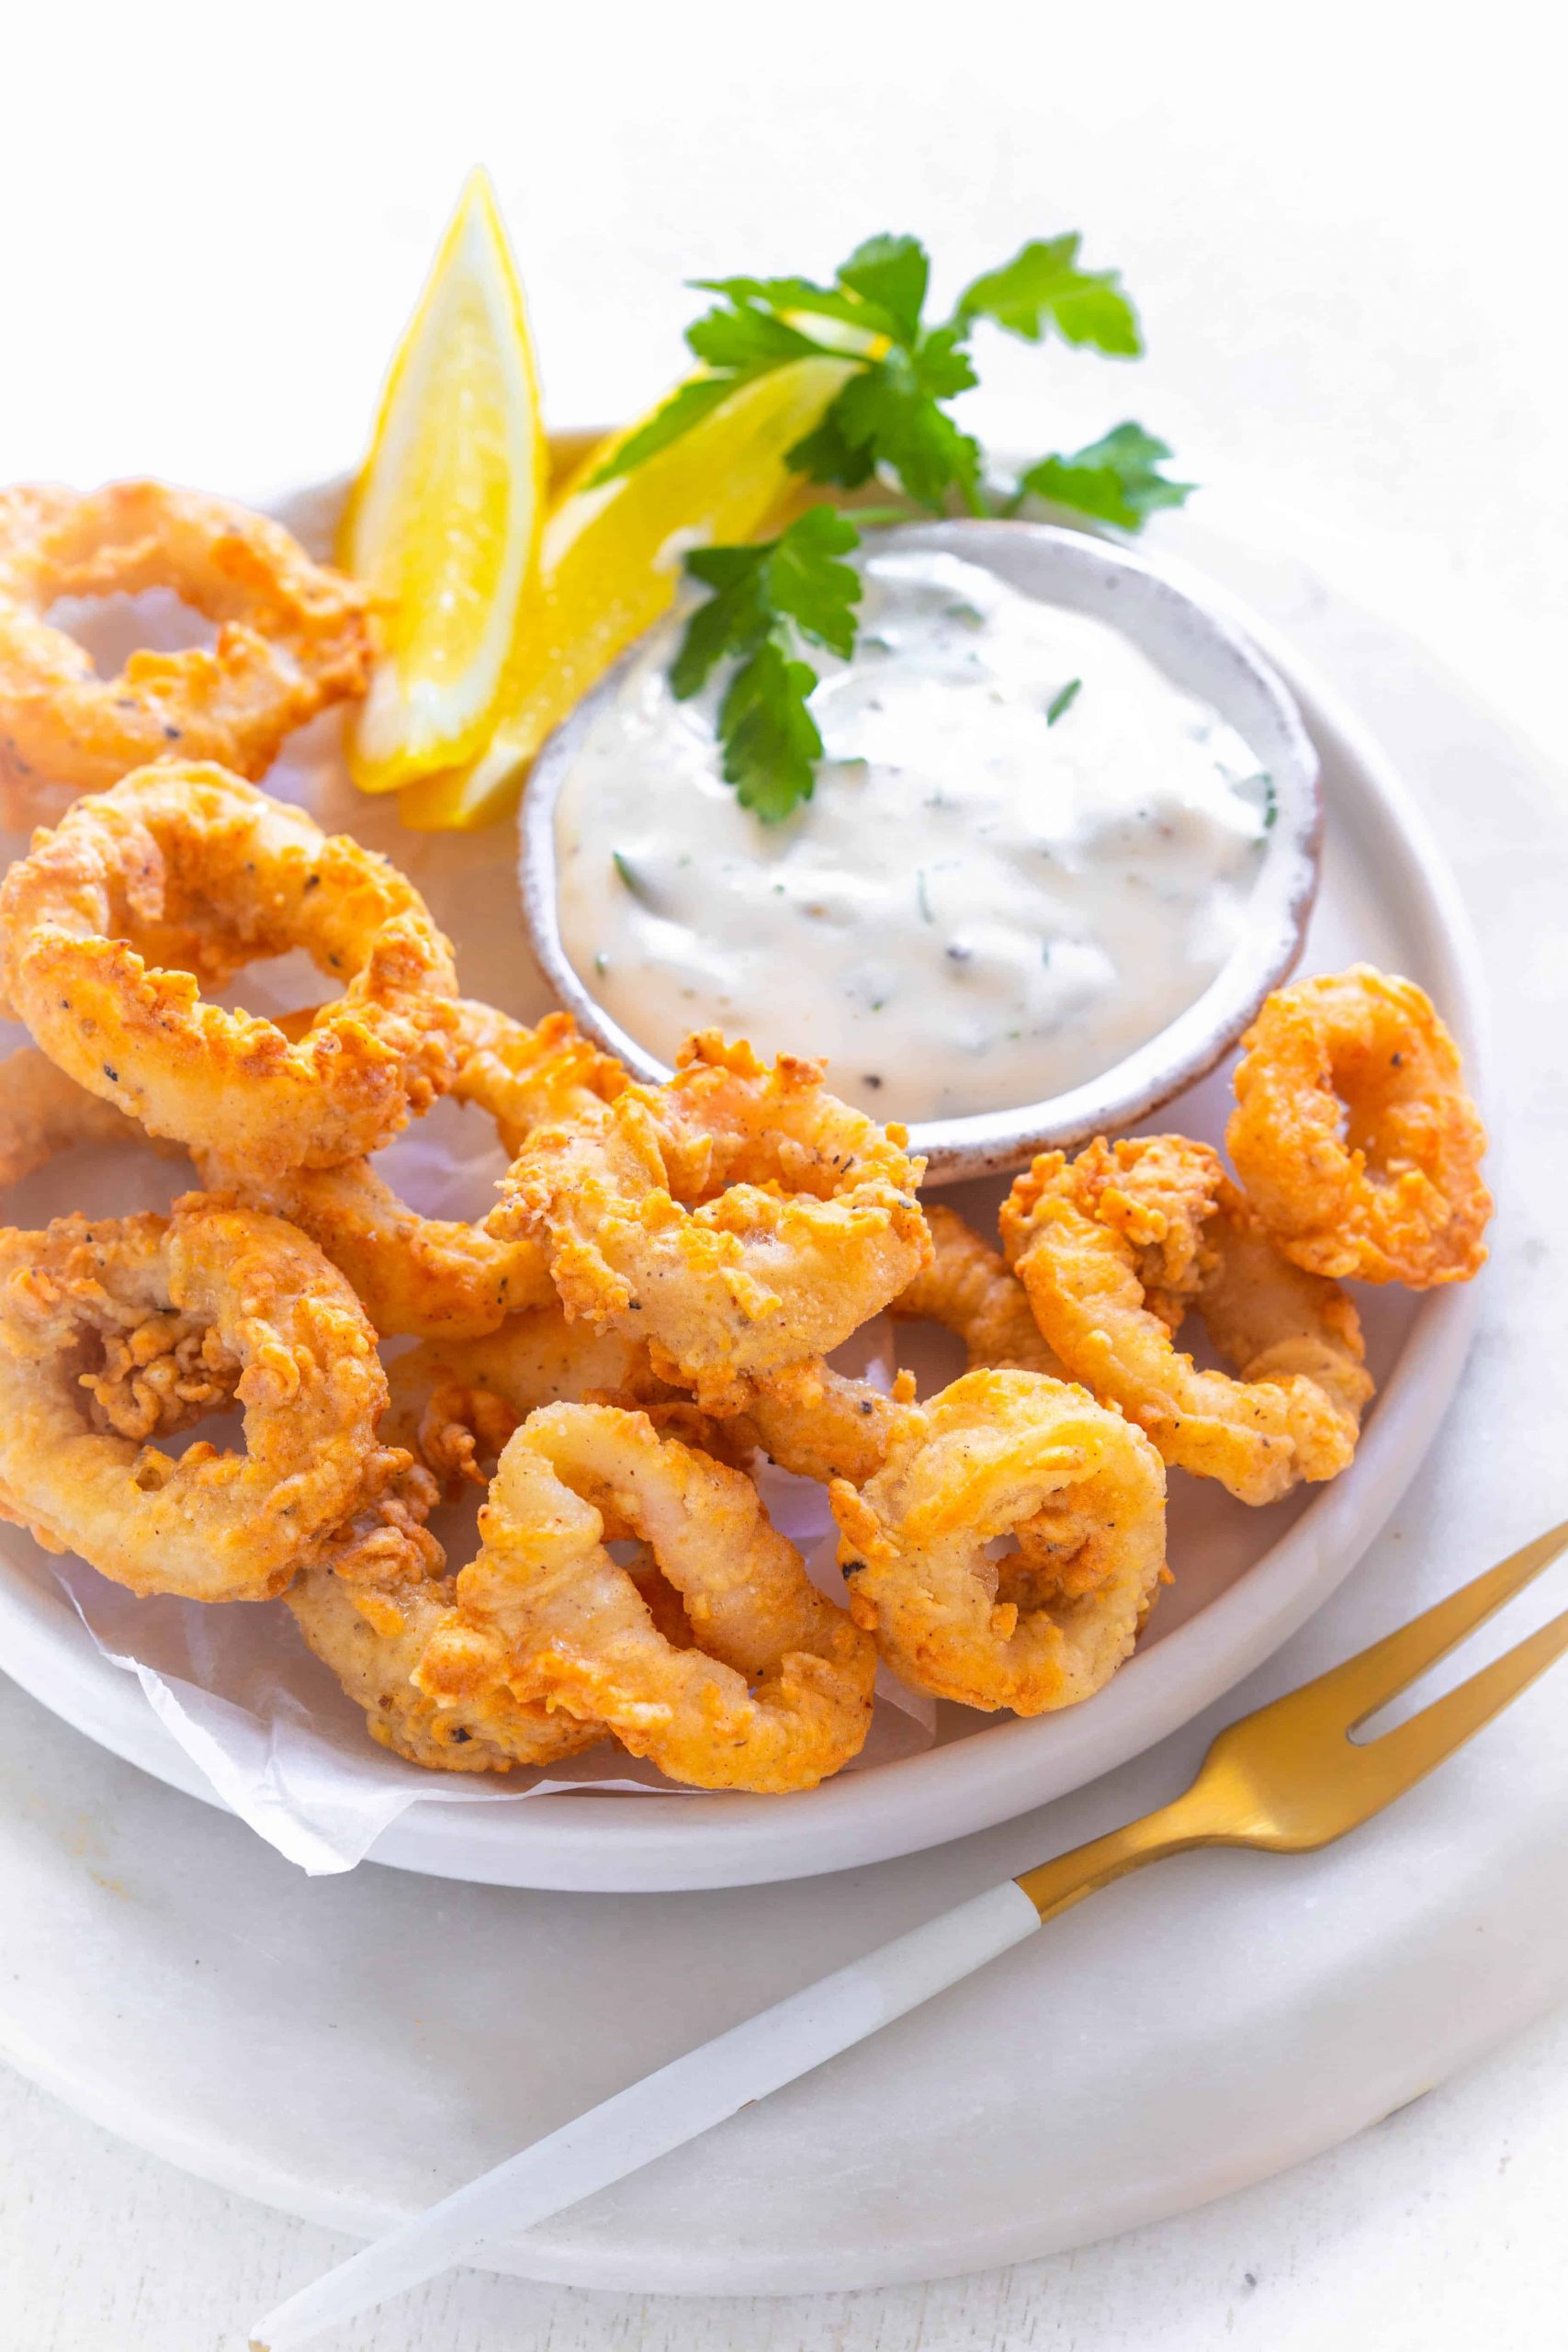
Combine: Mix together the crispy calamari with the stir fried vegetables and serve with lime or lemon slices, sweet chilli dipping sauce with a coriander garnish.
How to reheat calamari
Calamari is best eaten hot once cooked however leftover calamari can be reheated in 3 ways, the microwave, air fryer and in the oven. Though it should be noted reheating squid does make the texture chewier.
How to reheat calamari in microwave
Now although reheating calamari in a microwave, by placing it on a microwave safe plate, is one of the quickest options at 2-3 minutes (depending on the portion size) the texture of the calamari will no longer be as crispy if breaded and will become slightly soggy.
How to reheat fried calamari in air fryer
Place the calamari in small batches into the air fryer basket, make sure you do this in a single layer to maximise crispiness and even cooking. Air fry for 3 minutes at 356 °F /180°C.
How to reheat fried calamari in oven
Lay the calamari on an oven sheet, ensuring they do not overlap. Preheat the oven and cook for 8-10 minutes at 356 °F /180°C.
How do you cook frozen calamari in an air fryer
For the best results using fresh calamari will ensure the most tender texture. However, you can buy raw frozen calamari rings and leave to thaw overnight in the fridge in a sealed container. Once thawed you can continue, clean, season or flour coat the calamari.
How to cook calamari rings from frozen
Premade frozen calamari squid rings are a great connivence product that can be cooked in the air fryer from frozen without the need to thaw. Once the calamari rings have been removed from the packaging place into the air fryer spray or brush with oil and cook for 365 °F /185°C for total time of 8-10 minutes. Flip the calamari rings halfway through cooking.
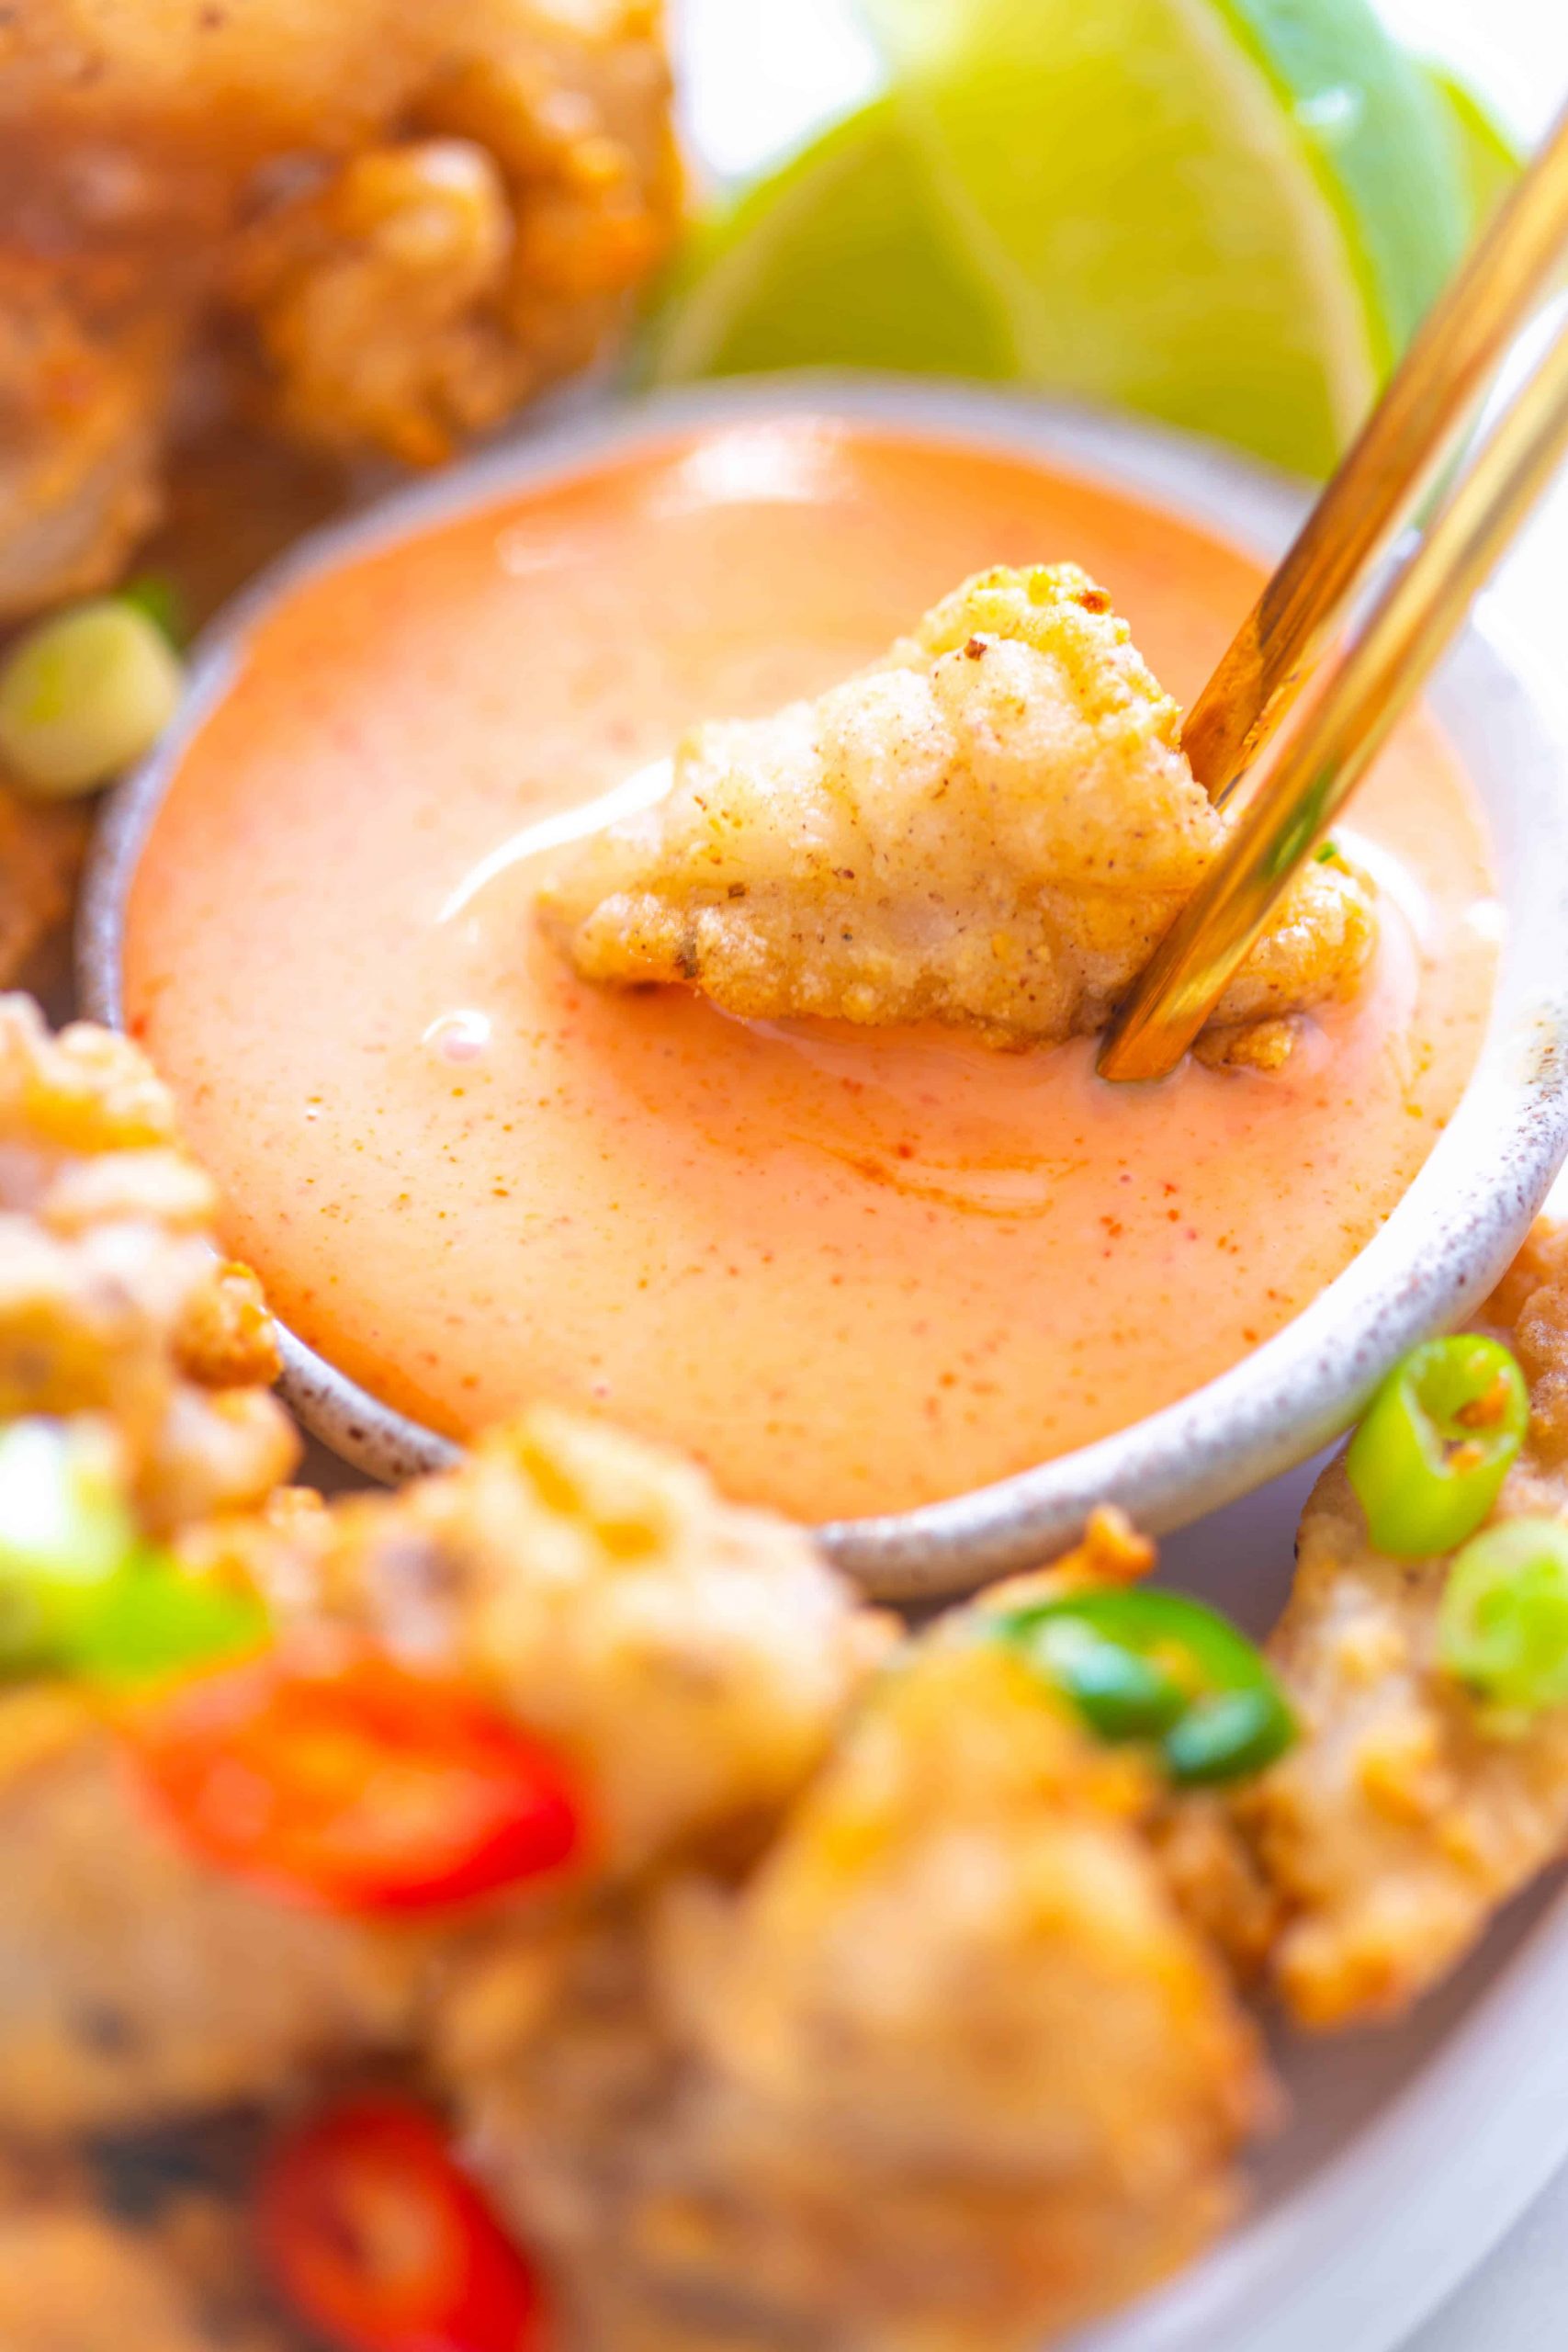
What do you dip calamari in
Crispy calamari taste’s even better when dipped in sauce! There are a variety of sauces and ingredients that you can add to a small bowl and serve as an appetizer. Here are some of the best dipping sauces to choose from below:
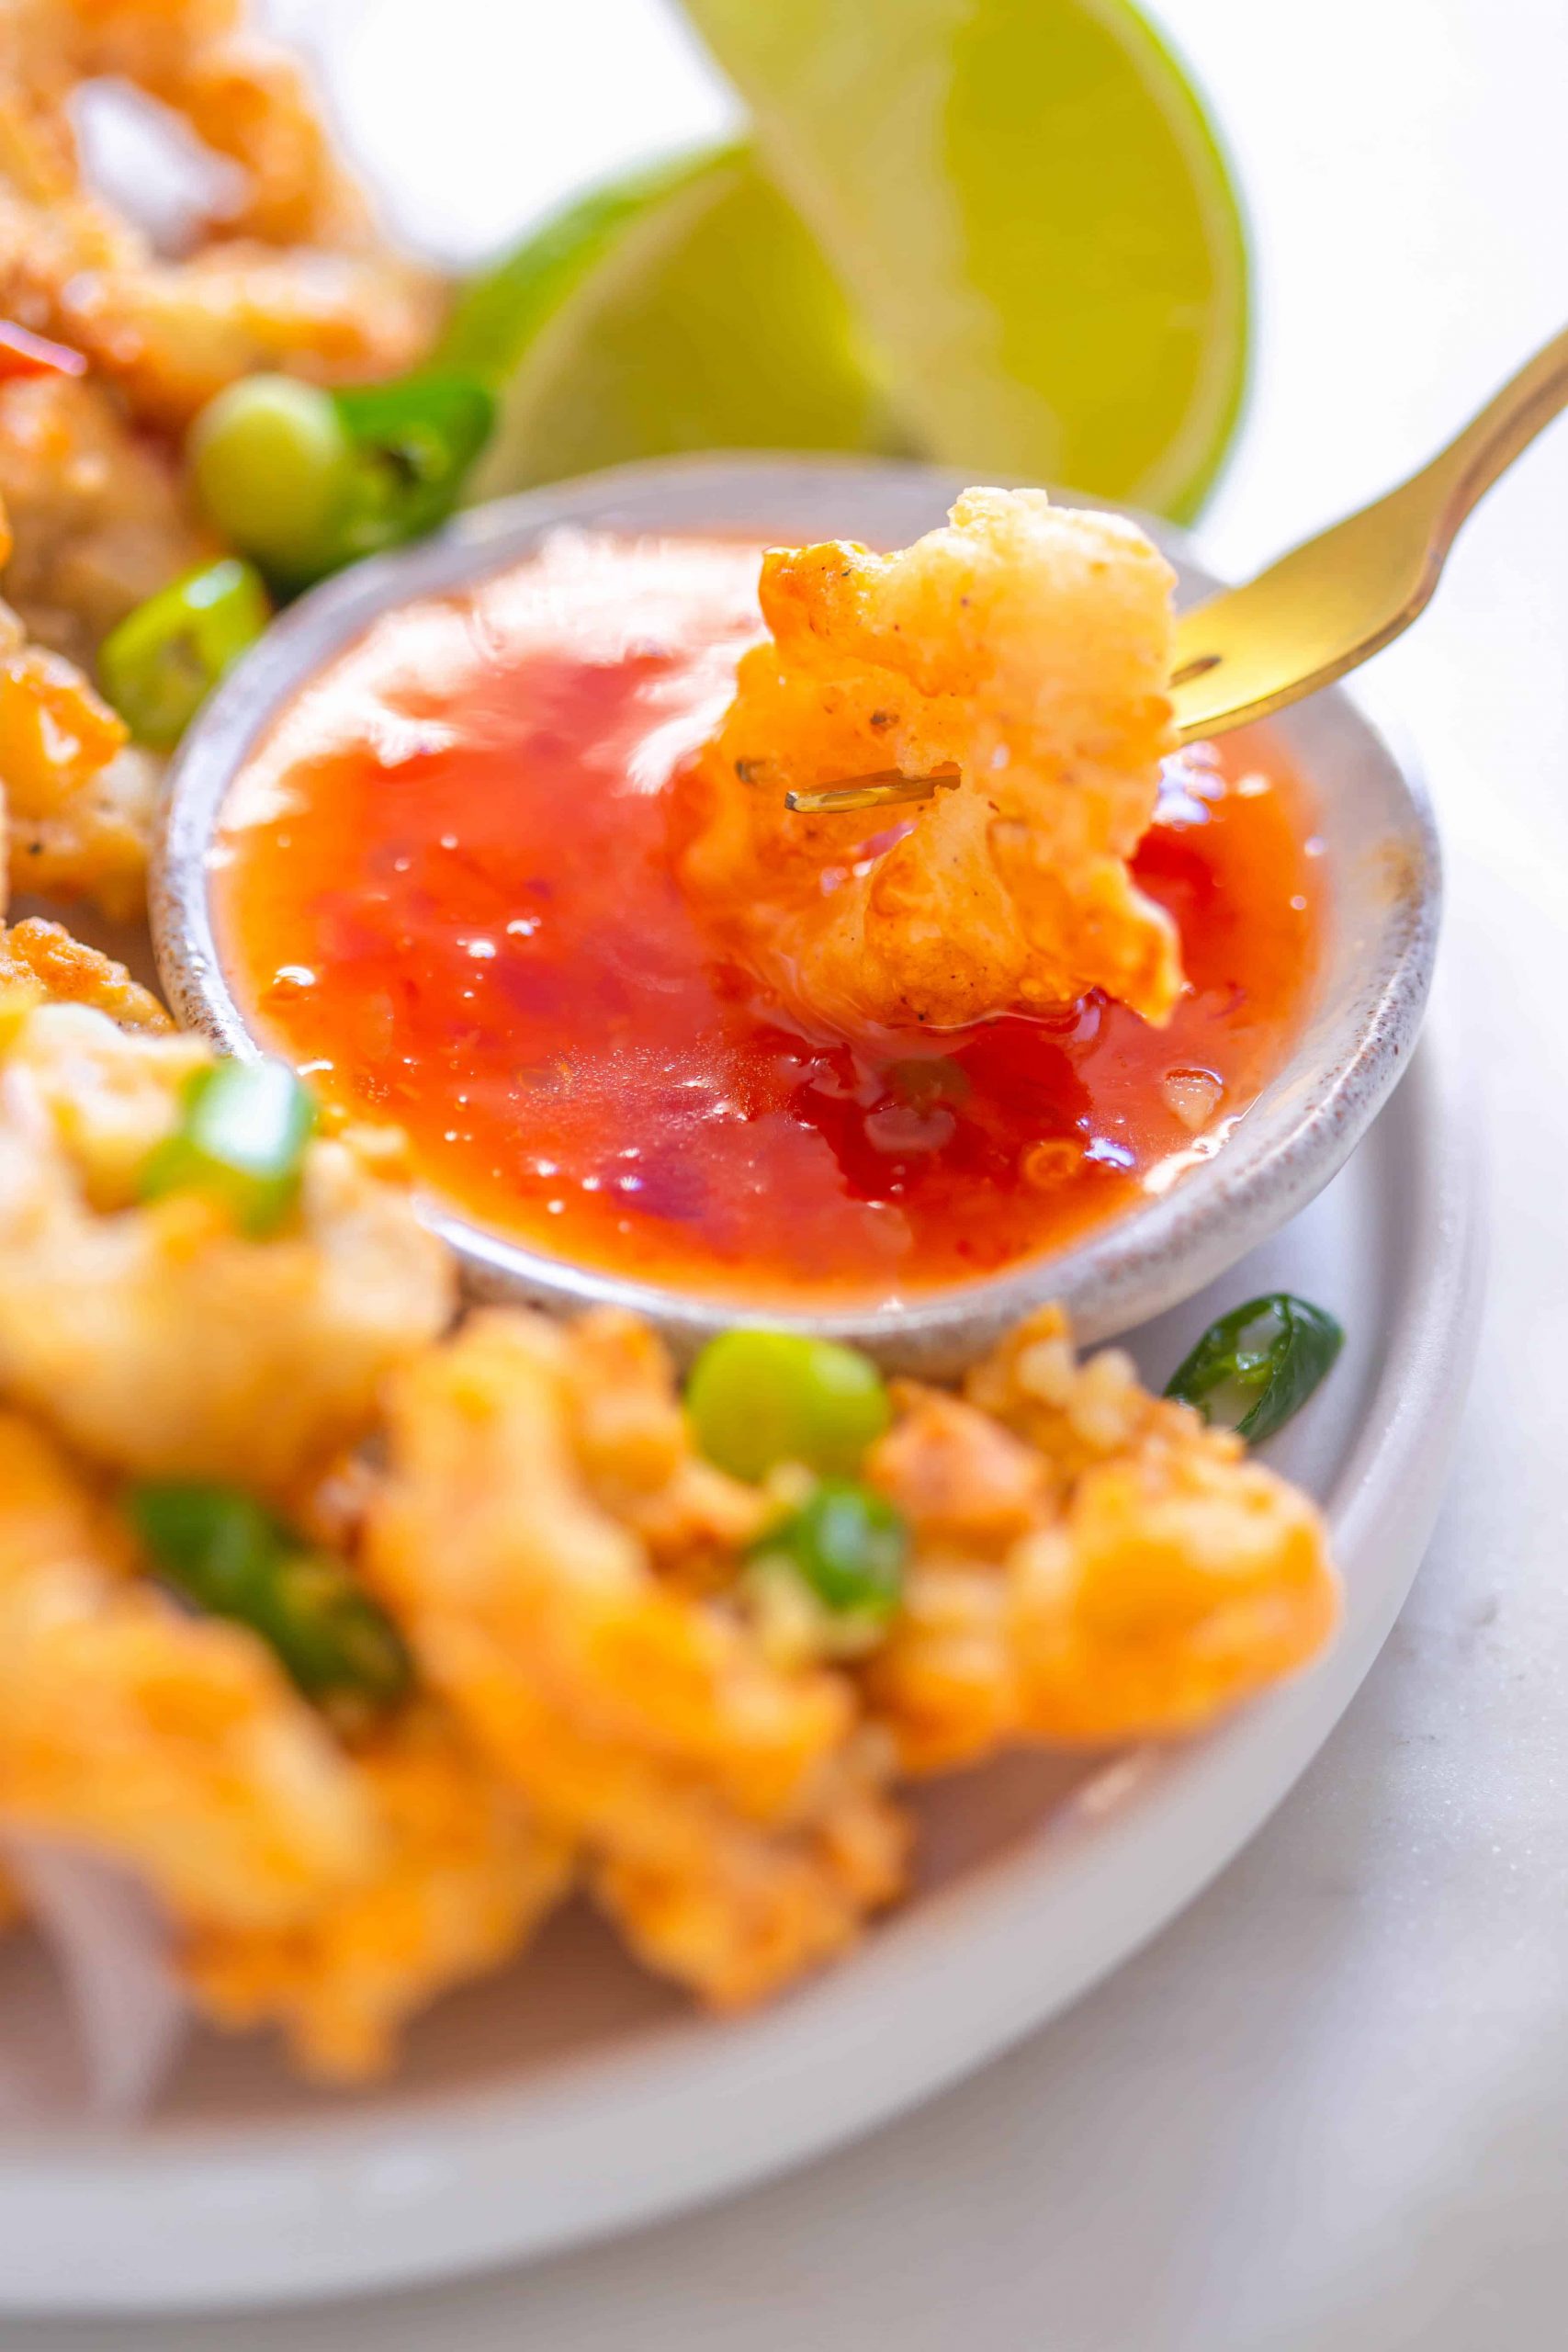
- Sweet chilli sauce
- Thai Chilli Lime Sauce
- Siracha chilli sauce
- Cocktail sauce
- Siracha mayo
- regular soy sauce or light soy sauce
- red chili pepper and garlic sauce
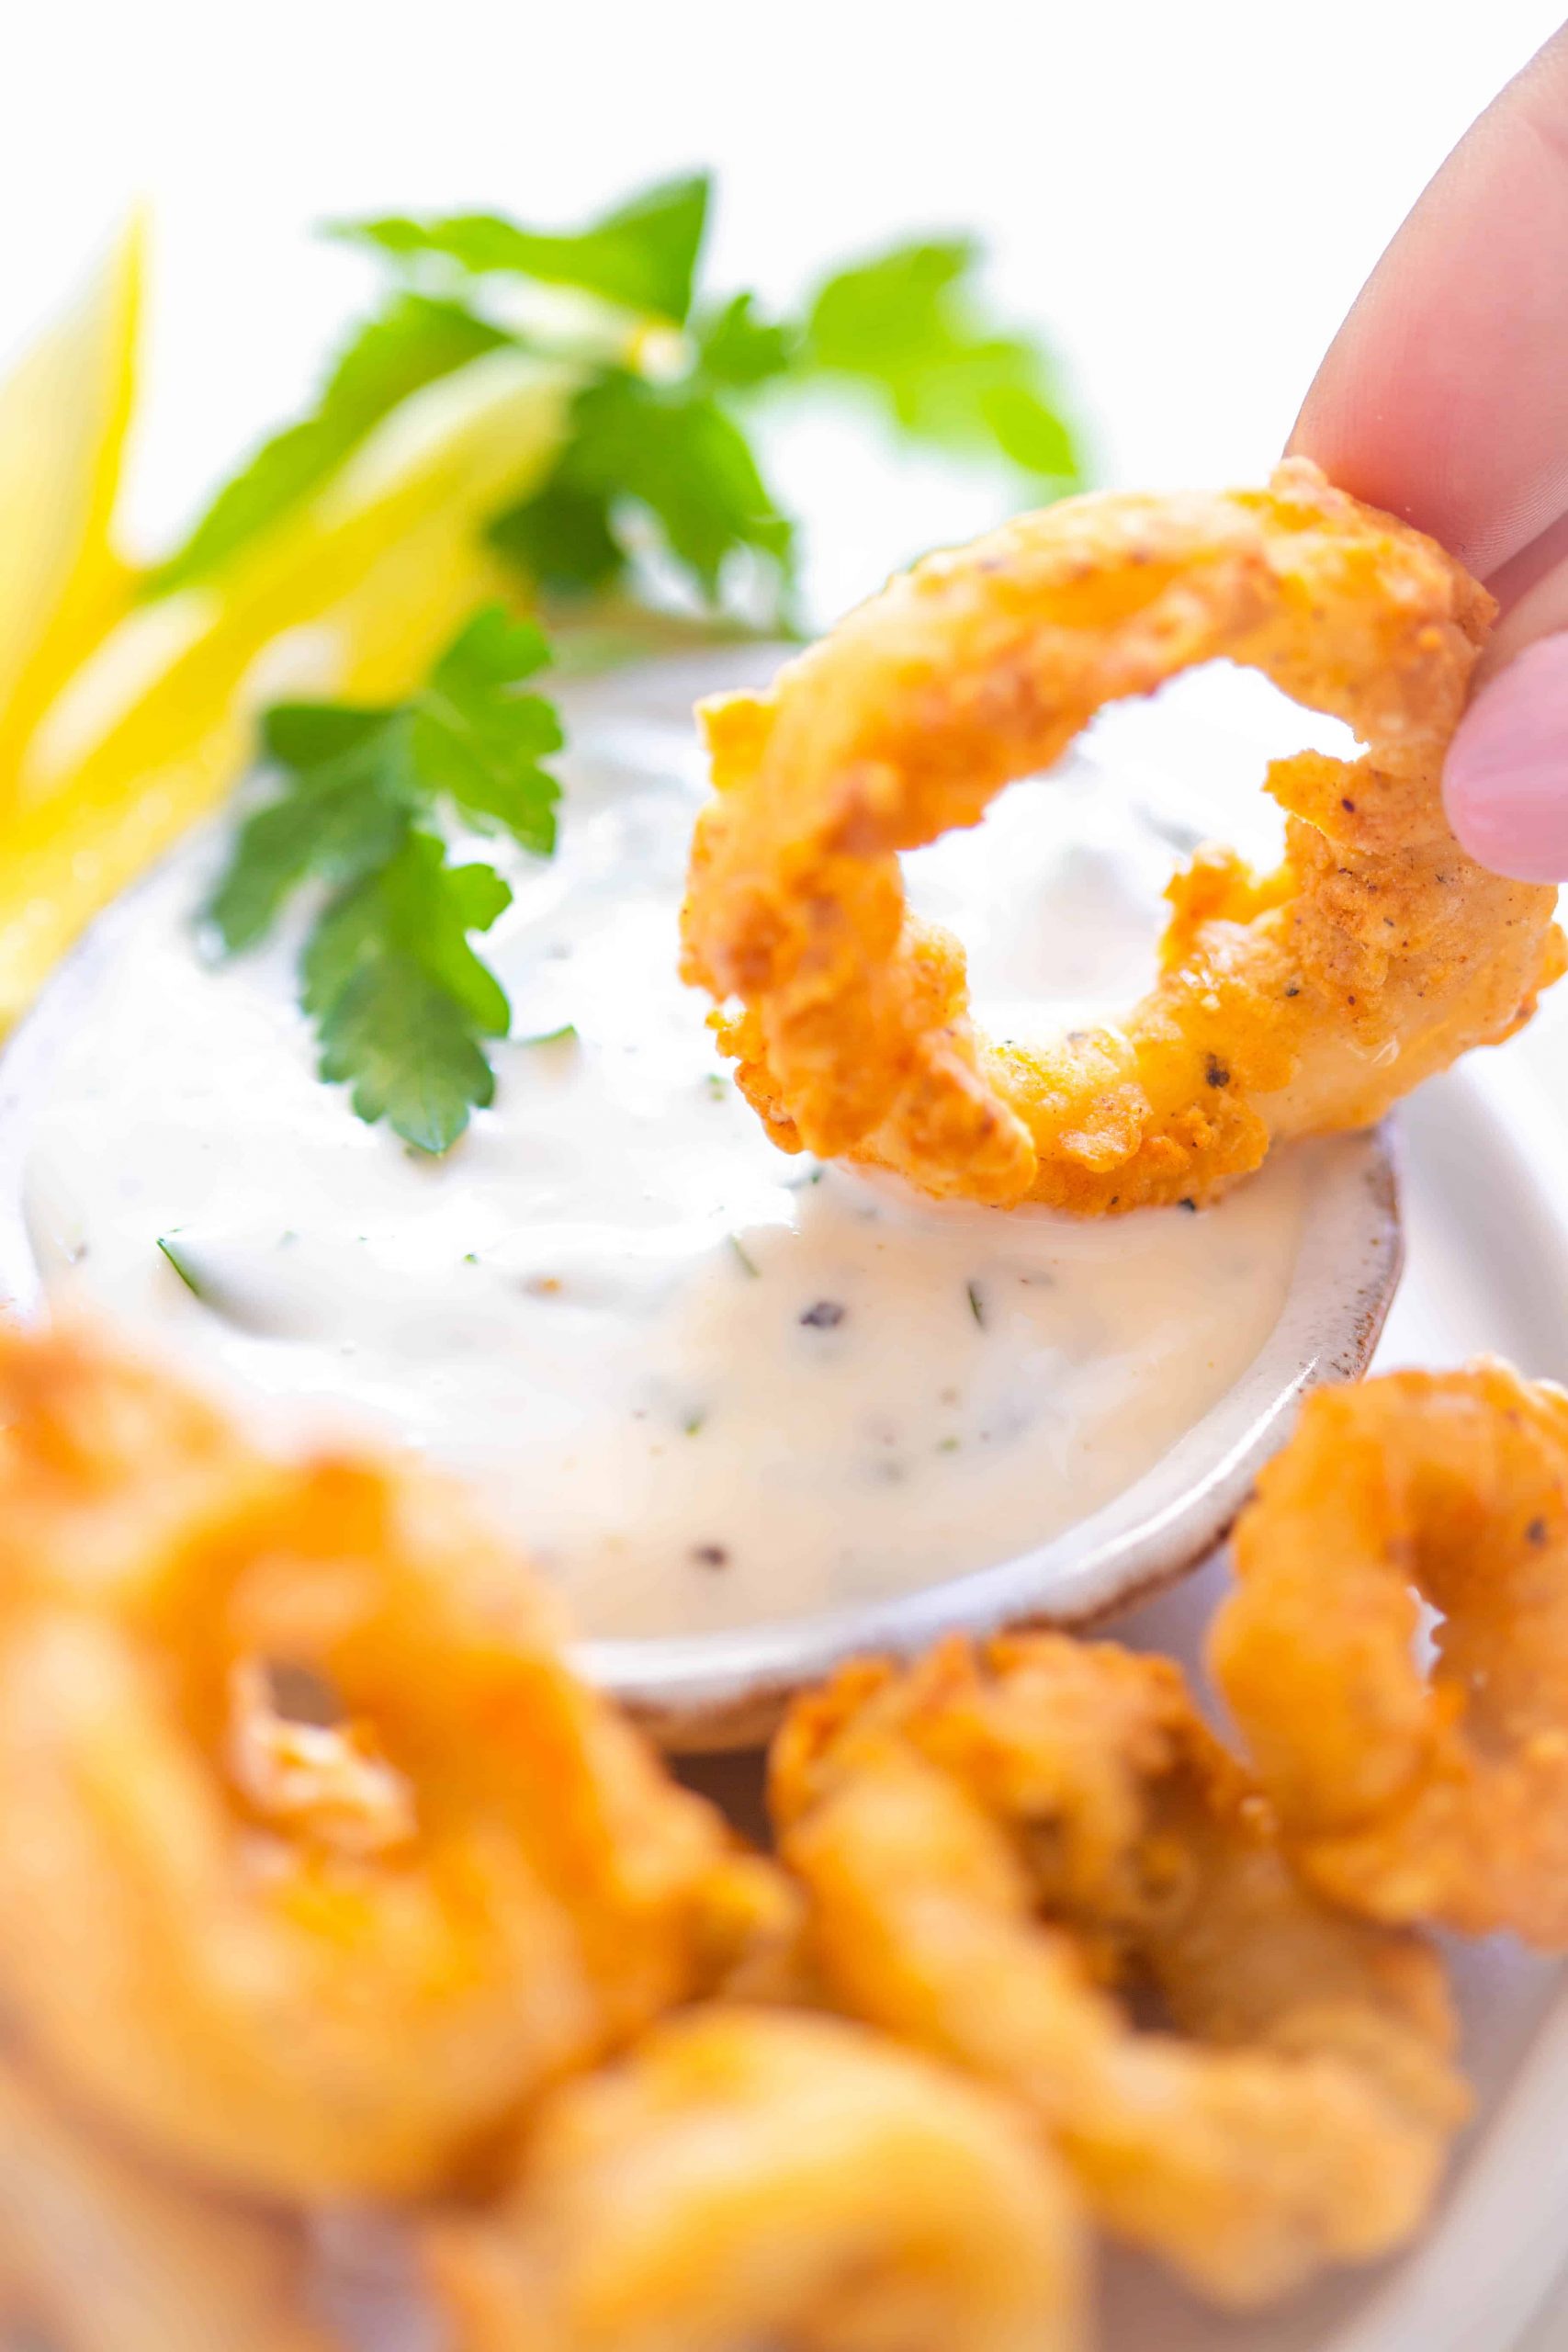
- Garlic aioli
- Chilli oil
- Creamy lemon sauce
- Marinara sauce
- Ginger, garlic, oyster sauce dip
- A squeeze of lemon juice
Nutritional information
How healthy is calamari
Calamari is a good choice as it has high levels of high levels of omega-3s, vitamin b12 and protein. Another great thing is that air frying is a healthy version of cooking calamari instead of deep frying.
Keto calamari air fryer
Calamari cooked in the air fryer can be a great low carb delicious appetizer. The rice flour could be substituted for a low carb flour alternative or the calamari without bereding ding will also be keto compliant
How many calories in salt and pepper squid
This easy air fryer calamari recipe yields for servings at 180 calories per portion approximately.
What to serve with fried calamari
Calamari can be served with many dishes or as a stand-alone dish. Here are some suggestions of what to serve calamari with.
- Stir fried noodles
- AIR FRYER GARLIC PARMESAN TRUFFLE FRIES
- Stir fried vegetables
- Egg fried rice
- Tempura vegetables
- Pasta dishes
Air Fryer Salt & Pepper Calamari Recipe
- Total Time: 25 minutes
- Yield: 4 1x
Description
Air fryer Salt & Pepper Calamari is a Chinese takeout classic! This air fried calamari is crispy, crunchy, and spicy. A healthy & easy copycat recipe to make at home! Delicious squid coated in seasoned flour, air fried till golden brown & topped with stir fried garlic, chili, and green onions.
Ingredients
Squid/Calamari
- Fresh whole calamari/squid – 4 x small squid tubes cleaned no tentacles / 230 – 250 g (do not use frozen squid, *check recipe notes below)
- Fish Sauce – 2 x tablespoons
- Shaoxing wine – 1 x tablespoon
- Egg whites – 2 x eggs whisked
Seasoned flour
- Rice flour – 1 x Cup
- White pepper – 1 x teaspoon
- Ground black pepper – ½ teaspoon
- Garlic powder – 1 x tablespoon
- Chinese 5 spice – 1 x teaspoon
- Salt 1 x teaspoon
Salt & Pepper Stir Fry Vegetables
- Fresh garlic minced – 1 x tablespoon
- Spring onions / green onions – 2 x stalks finely sliced
- Small Red & Green chillies – 1-3 finely sliced
- Sesame seed oil – 1 x tablespoon
- Salt – ½ teaspoon
Garnish
- Lime wedges, sweet chilli sauce and fresh herbs (coriander)
Instructions
- Preparing calamari: Clean, prep and cut squid tubes (if purchased whole) into your desired shape, either a diamond pattern or squid rings. *Check the recipe notes for tips
- Marinating calamari: Place the calamari into a shallow bowl, add Shaoxing wine, fish sauce, and stir.
- Dredging: In another bowl mix together all the seasoned flour mixture ingredients. Add a handful of the marinated calamari pieces into the bowl, using your hands to coat each piece. Then dip the floured calamari into a bowl of whisked egg whites and finally dredge again in the seasoned flour mixture. The double coating will help to fully cover the calamari. Place them on a greased wire rack as you will need to do this process in batches
- Salt & Pepper Stir fry Vegetables: Place a small frying pan onto the stove at a medium heat. Pour in some sesame oil and stir fry the 2 minutes, adding the green onions last.
- Combine: Mix together the crispy calamari with the stir fried vegetables and serve with lime or lemon slices, sweet chilli dipping sauce with a coriander garnish.
- Air frying calamari: Add to the calamari into the air fryer basket in a single layer, use a nonstick cooking spray or brush with oil to generously cover the floured calamari. Air fry for 5 minutes at 375 °F /190°C flip over and then air fryer for a further 2 minutes.
Notes
*How to cut calamari rings: Place a freshly cleaned, whole calamari tube onto a chopping board, press down on the calamari with one hand so it lays completely flat and then slice vertically into thin strips.
*How to cut calamari so it curls: To make calamari that curls simply slice a freshly cleaned whole calamari tube down one side, on a chopping board. The calamari should now be lying flat. Using a very sharp knife to gently score the calamari diagonally across from each side, leaving a 1cm gap approximately between each scored line. Ensure not to pierce through the calamari fully. Repeat the process again on the same side but in the opposite direction, this will create little diamond pattens on the flesh. Once completed cut into a diamond shaped calamari pieces or strips. The diagonal criss-cross pattern will help the squid curl whilst deep frying, air frying, cooked in an oven, grilled, or sautéed
*Check blog post for tips on how to clean squid/calamari
*Fresh squid will provide the best tender results, raw frozen whole squid or pre cut frozen squid rings tend to be more tougher. Though you can use this if you are unable to source fresh squid
- Prep Time: 18
- Cook Time: 7
- Category: appetizer
- Method: Air Frying
- Cuisine: Chinese
CLICK THE IMAGE BELOW TO PIN ONTO YOUR PINTEREST BOARDS